Monday, March 3, 2014

Cabin Bookcase


Posted by
Labels: , , ,
We needed a small set of shelves for our tiny cabin I first mentioned here to use as general storage.  I decided to build a set out of spruce to match the existing furniture in the room.  I considered doing a pretty typical set with through dadoes in the sides to hold the shelves, and rabbets at the joints between the top and sides and bottom and sides.  I wanted to try out making half blind dovetails by hand, just because I never had.  So I decided to use that joint to join the top and sides and bottom and sides.  Another design goal was to keep it light and easy to transport.  To address this, I decided to make it without a face frame.  But I didn't want the through dadoes in the sides showing from the front, so I decided to do stopped dadoes to hold the shelves.

I began by crosscutting and ripping my boards down to size.


Right away, I discovered that I had not bought enough stock for the project.  I was counting on some additional stuff I had on the lumber rack to work, but it turned out not to be big enough.  Being a cheapskate, I decided to just laminate up some scrap I had on hand to make up the difference.  I began by jointing one side of each piece.


Then I put some biscuit slots in the two pieces to be laminated.


I applied glue to both pieces clamped on edge, and then put the biscuits in and clamped them up.


Then I turned my attention to the half blind dovetails. I started out by making the tails.  This is done just the same way as if you were making through dovetails.  I first make layout marks.


Then I cut down the sides of the tails with a handsaw.
 

Then I chisel away the waste.  I chisel in half the thickness of the board from one side, then flip it over and chisel to meet the first cut.


Here is what it looks like at the half way point.


And, finished.


Then I use the tails to make the layout marks on the end of the board where the sockets will go.  The rest of the lines are made with marking gauges and my marking knife to complete the shape.


Making the sockets begins with the saw.  I cut in on the edge of the board just on the waste side of the line.  This, of course, only allows you to go part of the way as deep as you need to.


Then I come in with the chisel and mallet to define the inside vertical section of the joint.


Then I  take the chisel and mallet in from the end grain to remove the remaining waste.


And here are the finished sockets.


Here is one of the joints test assembled.


Once all 4 corners are made in this fashion, I begin layout for the stopped dadoes that will hold the shelves. I clamp the sides together and square the marks across both at once so the dadoes will match.
 

Then I square the lines across the inside face of each side with my knife and square.


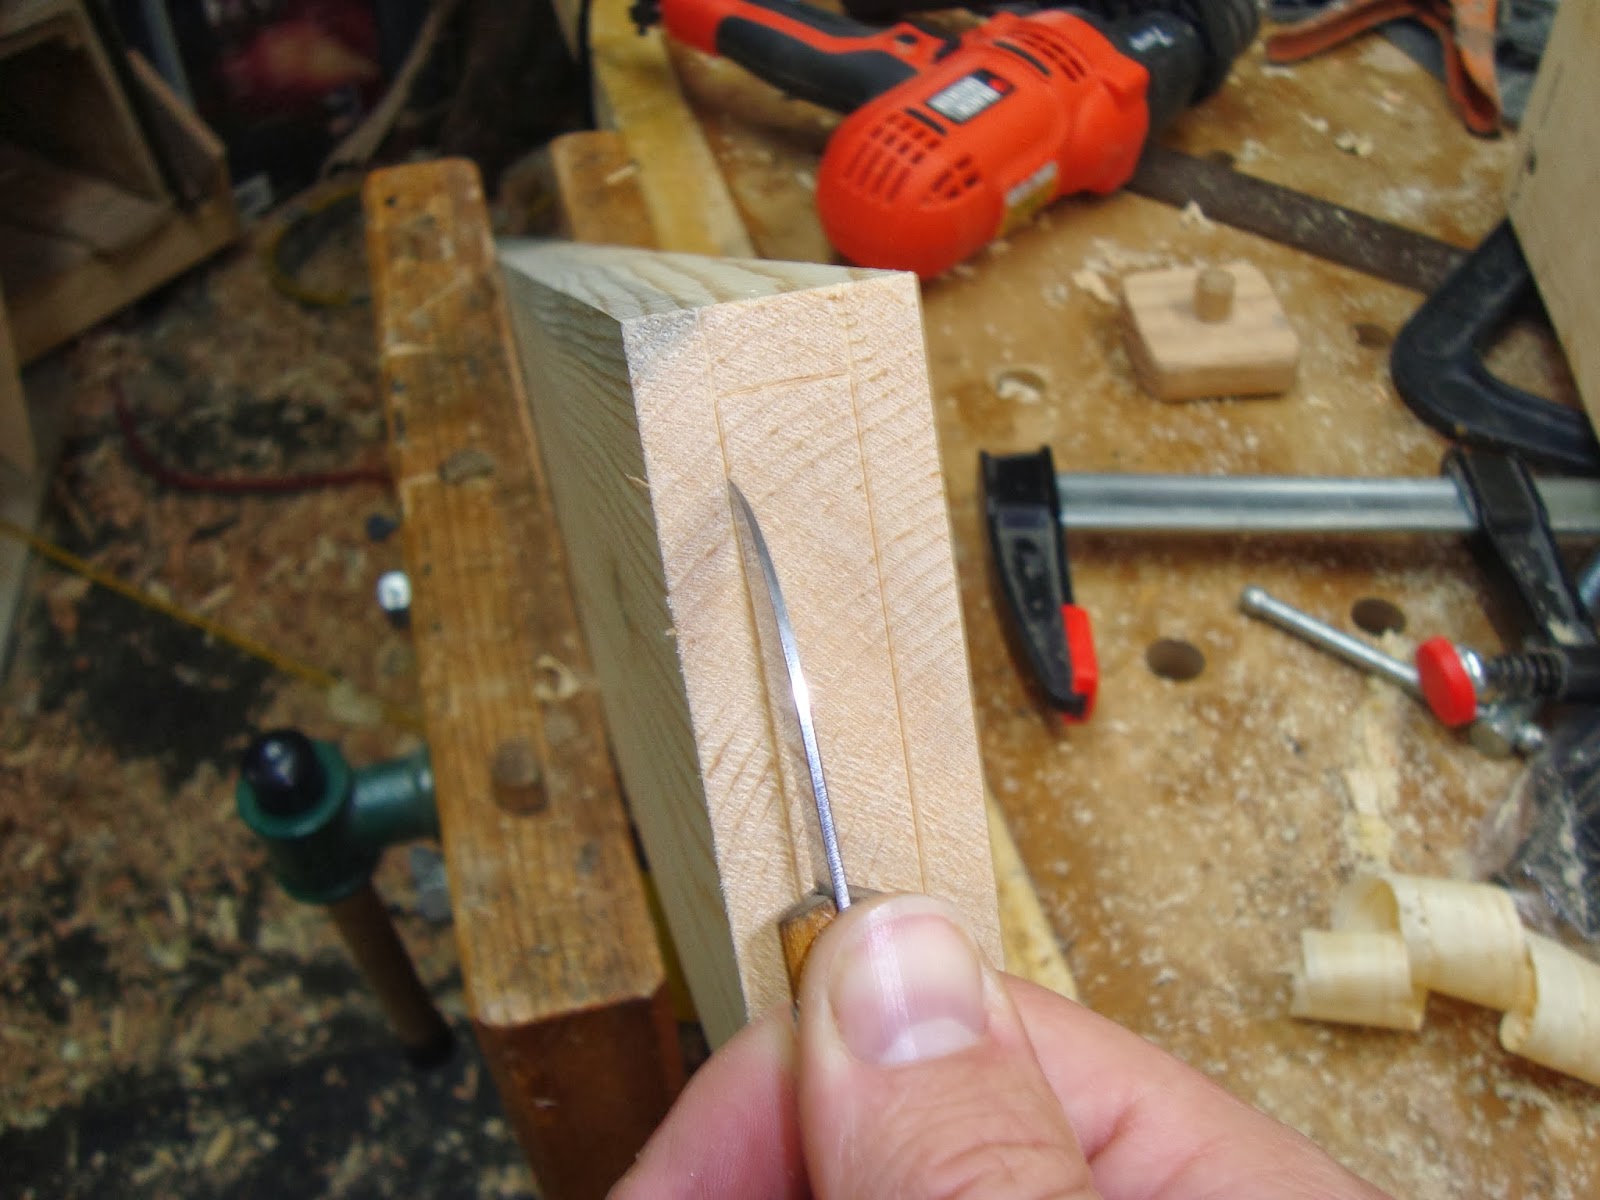
 In keeping with the made by hand theme I had going from the half blind dovetails, I cut the stopped dadoes by hand.  The only other way I could come up with to do it was to use a handheld power router, and that just didn't sound like fun to me.  I started by deepening my knife marks with a chisel and mallet.


Then I pare into my knife line, creating a relief so the chisel can go in further on the next pass.


I keep repeating this until I reach the full depth I intend for the dado to be.  Here you can see one in process at about half the intended depth.


Then I pare in with the chisel from the end to quickly remove most of the waste, but I don't go full depth.


A hand router takes the groove down to its final depth.


  The shelf boards need a notch cut into their front so that they can fit into the dado and still sit flush with the sides.  I just cut these out with my handsaw.


Some tweaking of the thickness of the shelves is required to get the right fit in the dadoes.  Here I am thinning a shelf down a bit with a hand plane.


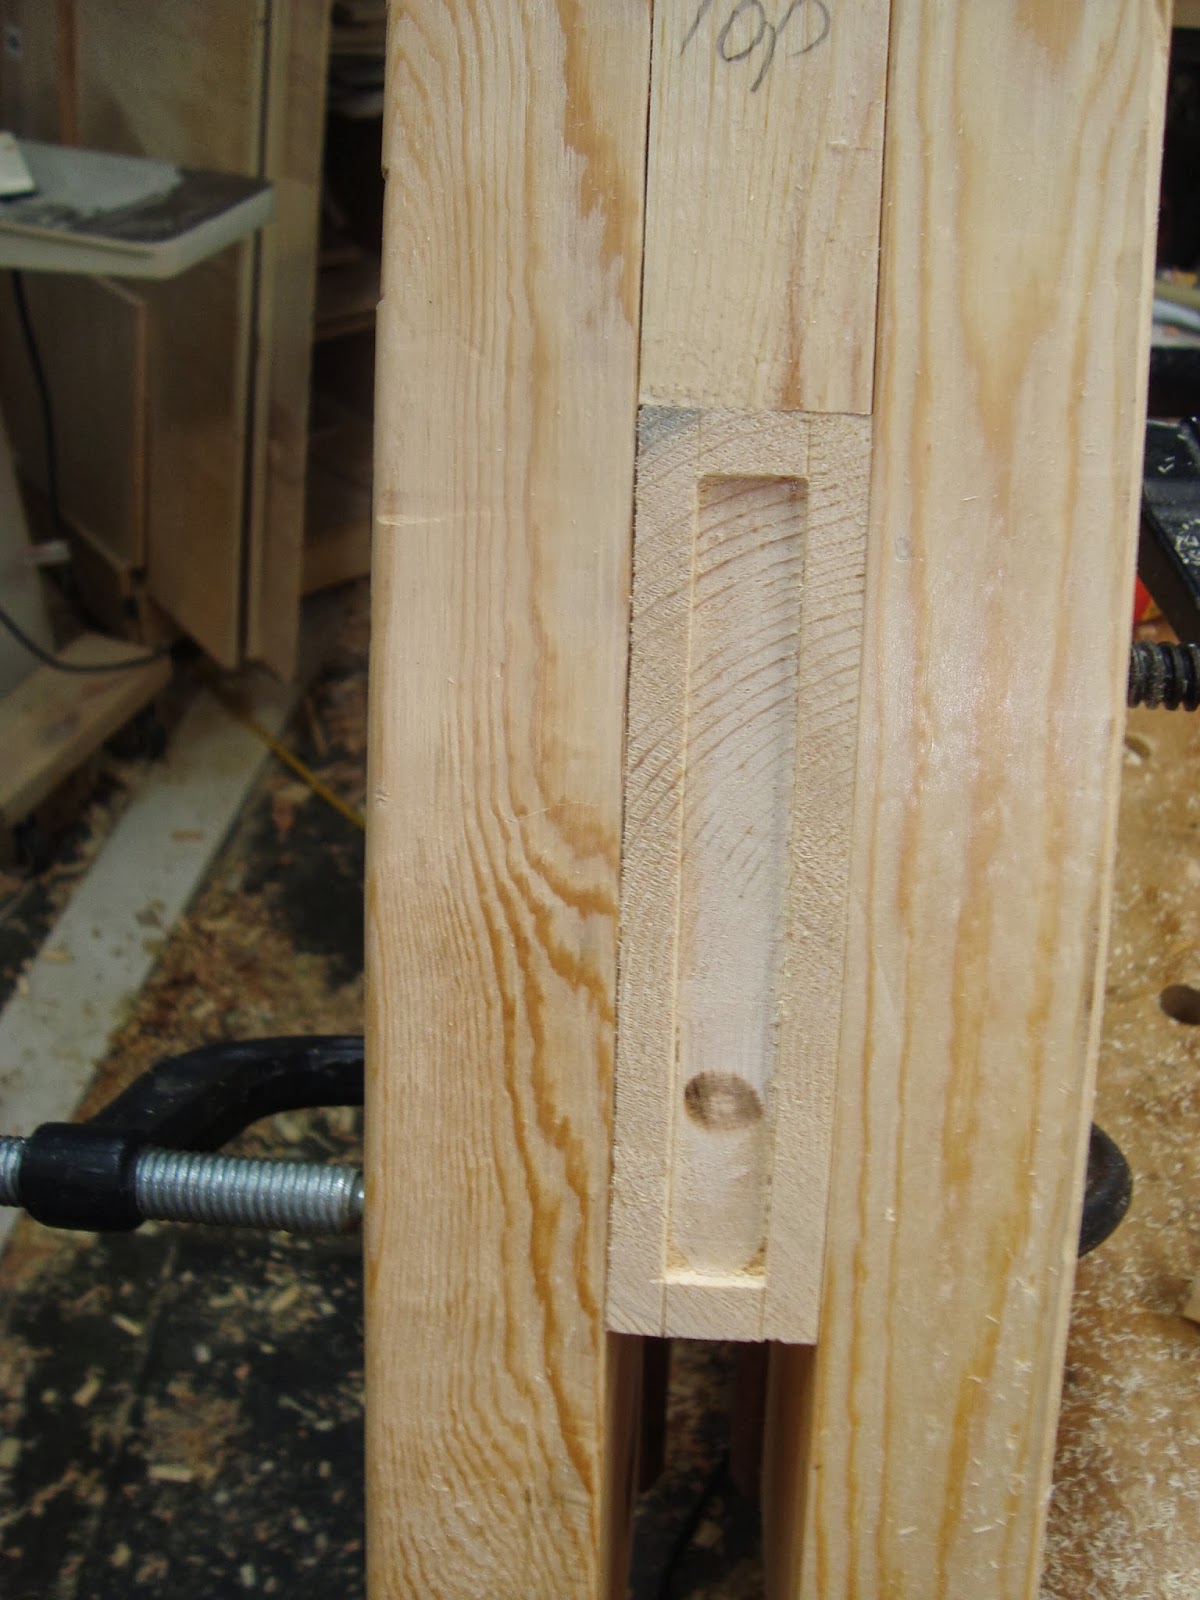
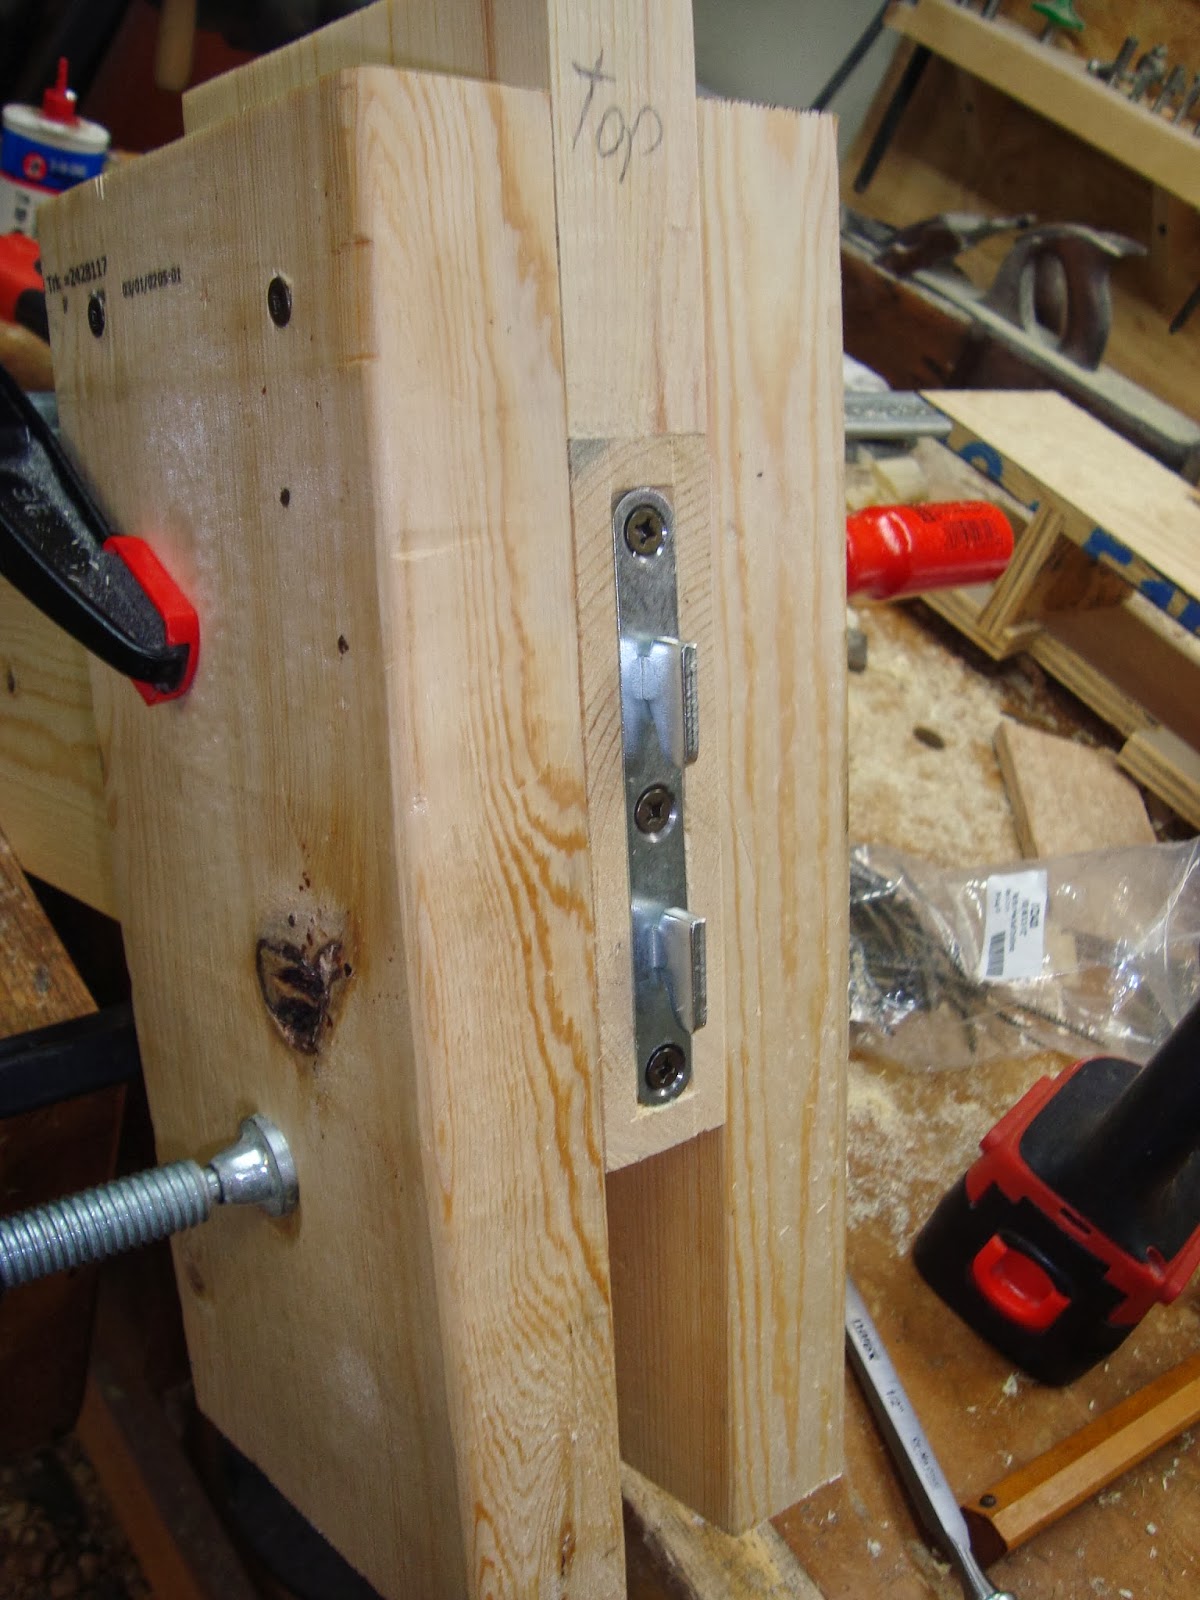
Then, I got a little dovetail happy and screwed up.  This set of shelves is pretty narrow and tall, so I was concerned about it tipping over.  I wanted to put in a cleat just inside the top to allow me to screw the shelves to the wall to prevent this.  So I made a cleat with a couple of dovetails on the ends.


I cut half blind sockets into the sides to match, but I didn't think about the fact that these sockets were oriented the wrong way with respect to the grain and too near to the ends of the sides and of course the sockets blew out while I was chiseling them.  Sheesh.  So I cut them off and glued on some pieces to fill in the gaps.


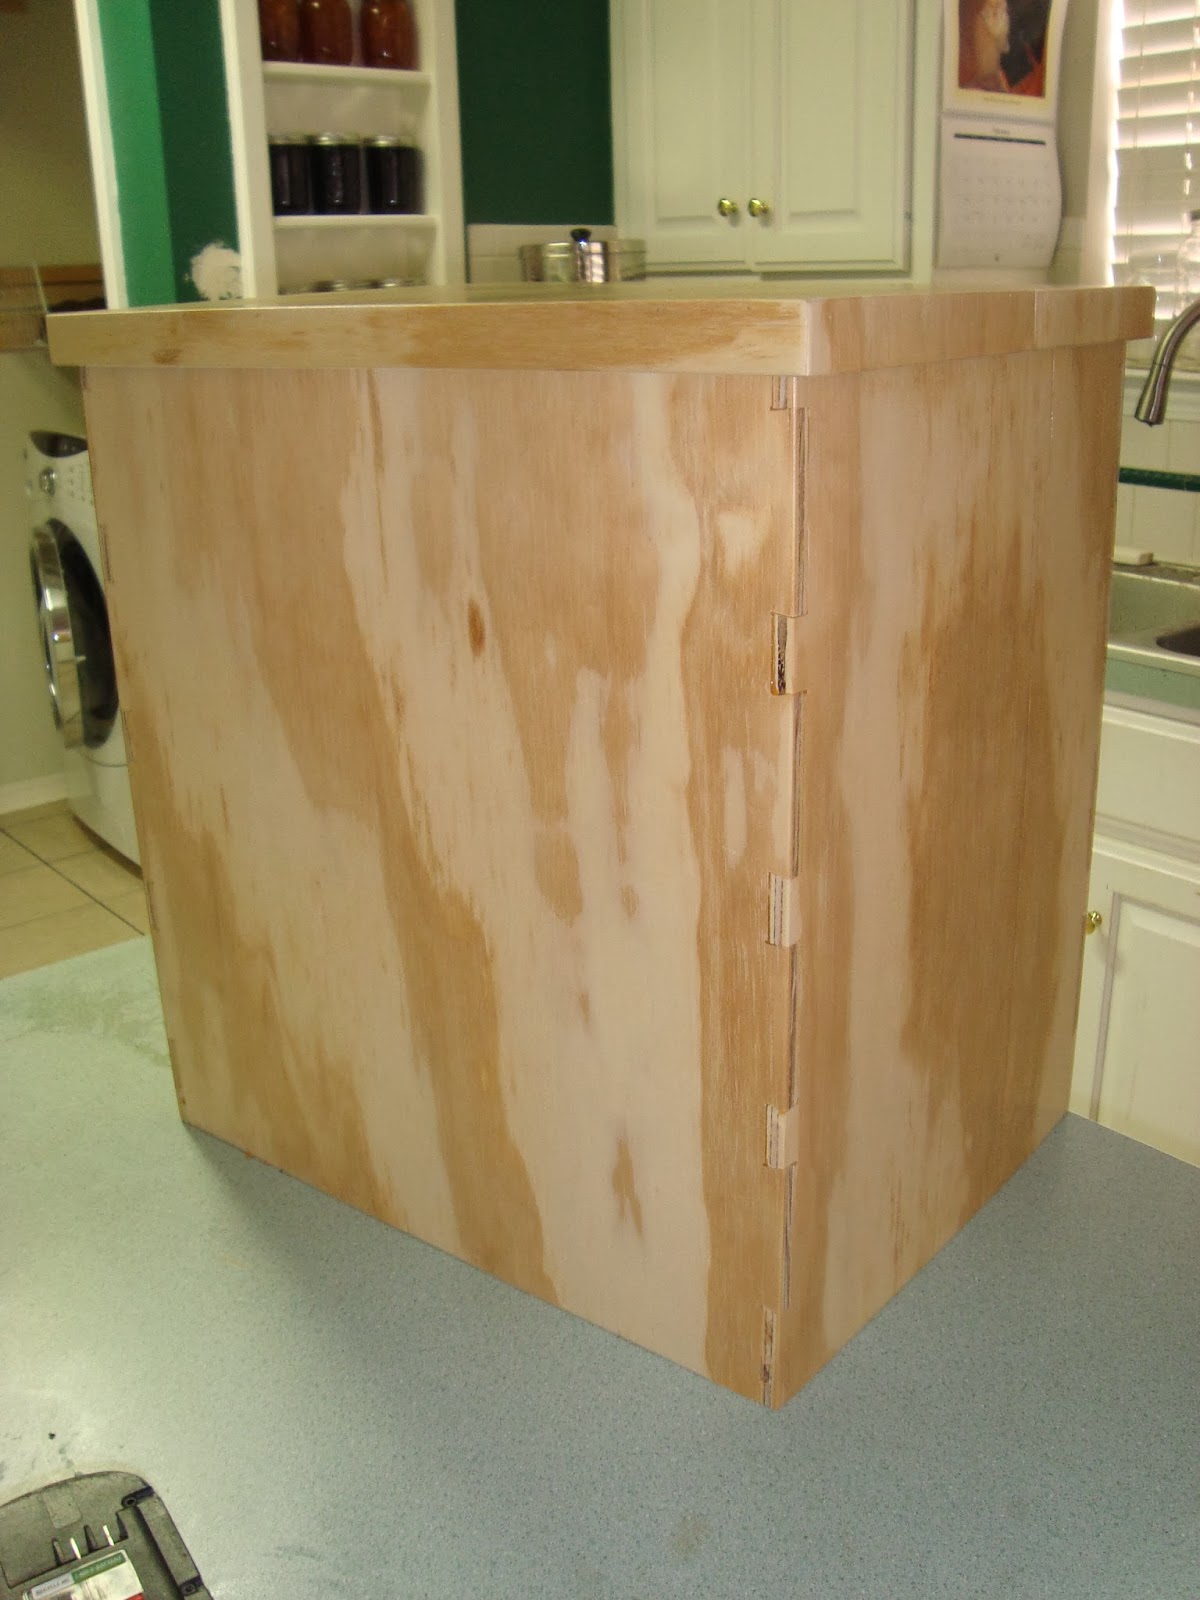
I trimmed and planed them flush.  You can make out the patch on the top left in this picture.


Next I planed the sides, shelves, top, and bottom all smooth.


I rounded over the front edges of all the pieces with my router, and sanded everything lightly.  Then I glued it up.  This required every clamp I had plus 3 new ones.  Luckily I realized I needed 3 new ones before I started gluing them up.  This is the reason why you are supposed to do a practice run on a big glue up like this before you actually apply any glue, and I'm glad I didn't skip it like I often do.


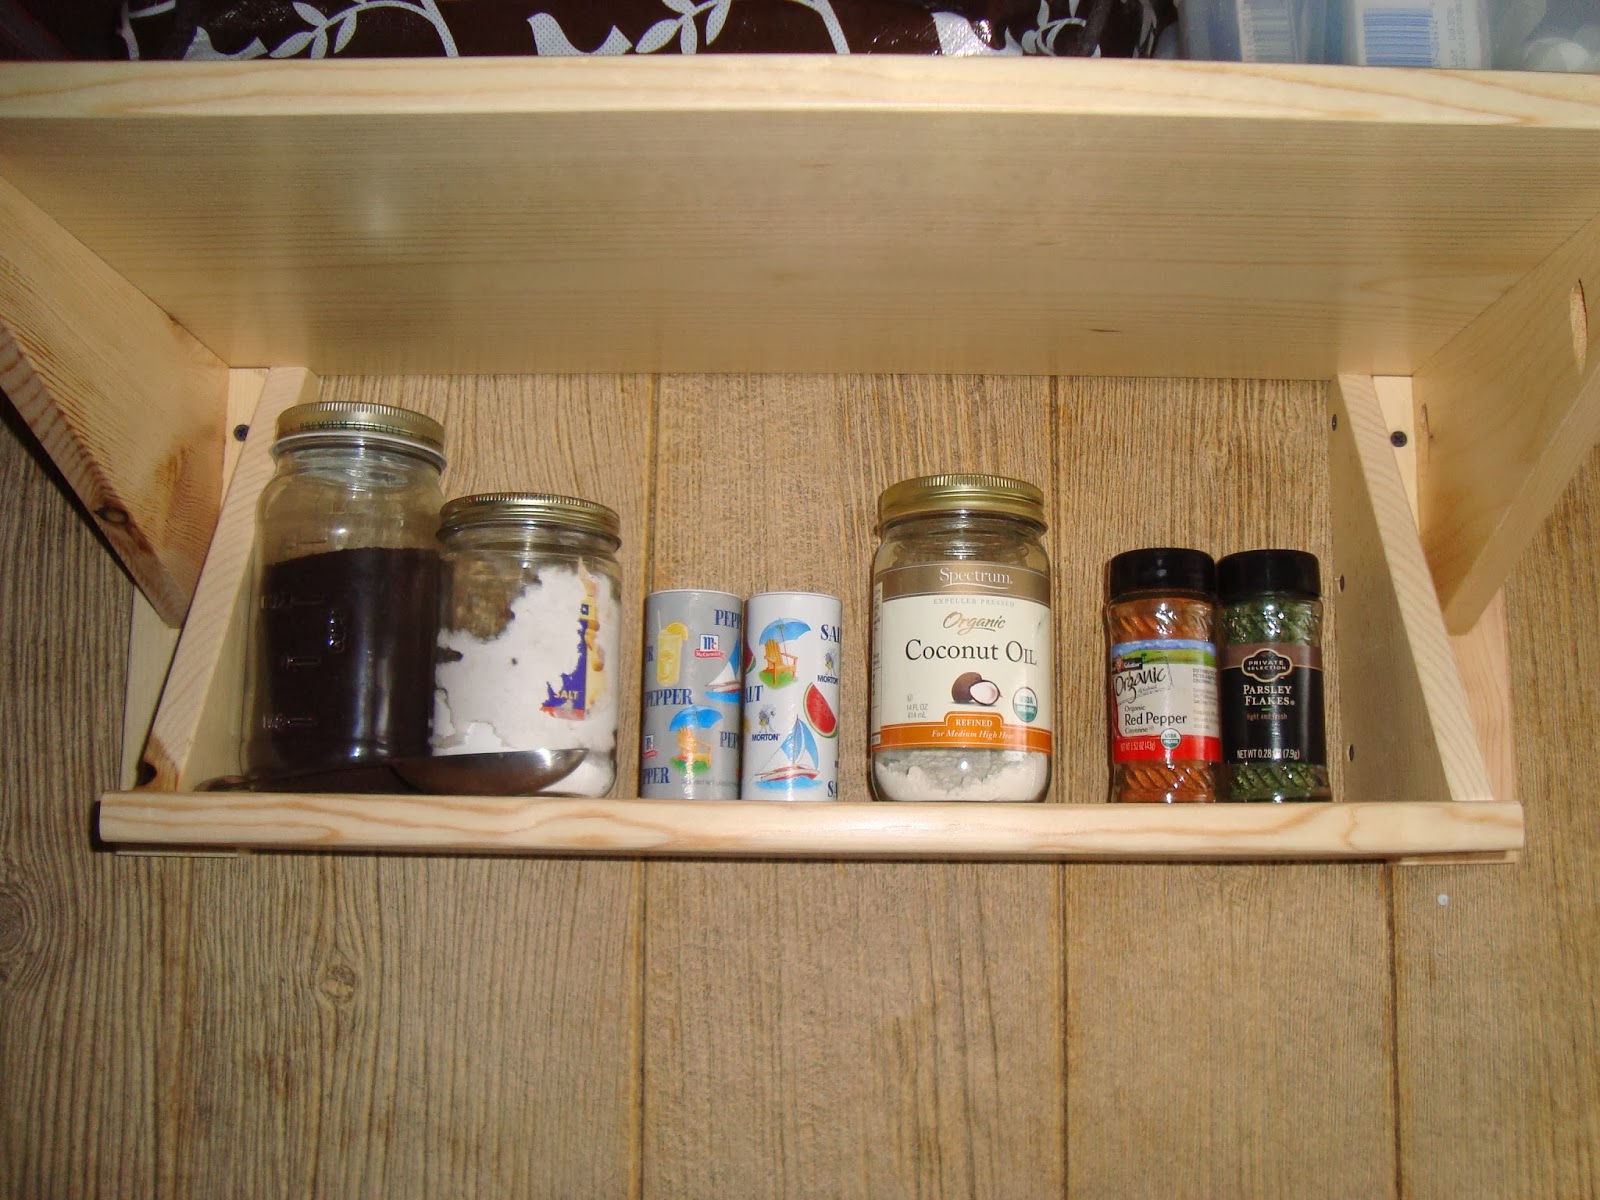
I went through my usual lengthy finish regiment with 3 coats of brushed on waterborne polyurethane, and here is the finished product at the cabin.  You can see it's already making itself useful!


Thursday, February 20, 2014

Bunk Beds - Take Two


Posted by
Labels: , ,
As regular readers will know, I recently posted an article on building a set of bunk beds for our small cabin.  We wanted to be able to accommodate four people staying in the cabin overnight, so we needed a second set.  Given the small size of the cabin, the second set would need some small design changes to fit in the space remaining.  I took my first sketchup model and basically trimmed it down where I could.


Since I already covered the build details on the first bed in full in my previous article, I'm going to just focus on the things I did differently for the second set.

There were a few differences in terms of length.  I made the long and short rails a bit shorter, and the posts just a bit taller.  I also thinned the posts down from about 3 1/2 inches square to 2 3/4 inches square.  Once that was done, it made all the "2 by" material that the rails are made out of look a bit too beefy, so I thinned them down to 1 1/4 inches thick.  I correspondingly adjusted the mortise and tenon widths down by the same 1/4 inch to 3/4 of an inch.

The biggest design change I made on the second set of beds was to replace the draw bolt joinery on the disassemble-able joints between the long rails and the end ladder assemblies with bedlocks I bought from Lee Valley.

All my rails and posts were prepared and the mortise and tenon joints cut in the same manner as the first bed, the main difference being that there are no mortise and tenons connecting the long rails to the end ladder assemblies.  Here is how I installed the bedlocks that replaced them:

I started by making layout marks with a marking gauge on the end of a long rail for the mortise to hold the male (hooked) section of the bedlock.


I deepened my marks a bit with a knife, being careful to stay on the line.


I then clamped some scrap to the sides to provide a wider base for my router base to ride on.


I set the depth of my router bit's cut to the thickness of the bedlock, then carefully freehand routed away the waste.


The deep knife lines I made allowed this to work well.  As you approach the knife line slowly and carefully with the router, the guide line encourages the wood to the waste side to sheer off, and the wood on the keep side of the line to stay put.


I squared up the ends with my chisel and mallet, bevel down.


I was very happy with the finished product.


Then the bedlocks are screwed in place with some good quality 2 1/2 inch long wood screws.


 Installing the female piece of the bedlock in the post begins in the same way, with the marking gauge and knife.


I then use my router freehand to remove most of the waste.


I square up the corners this time with my router plane.


The main body of the female section of the bedlock sits in a mortise, but it also requires two additional mortises for the hooks to slip into when the joint is assembled.  I mark these by placing the bedlock in its mortise and tracing the locations for the hook mortises.


Since these mortises were small, I decided to chop them out with a chisel and mallet.


They're not super clean, but it hardly matters as long as they function.


The new bed is the one on the right in these pictures


Overall, I am happy with the new design.  The slightly smaller dimensions on the pieces made the bed lighter and easier to transport.  Also, the bedlocks worked out well.  They didn't save me any money,  nor time to install them, but when it came time to finally assemble the whole bed they really made it easier.  If I had to make another set, I would definitely go with the bedlocks just for the easier assembly.  Trying to align all those drawbolted mortise and tenons on final assembly on the older set is really a chore.

Monday, February 10, 2014

Tails and Pins (Odds and Ends)


Posted by
Labels: , ,
I have been making several hand cut dovetailed items over the past couple of months.  First, some small shelves for the cabin:


These are meant to hang under an existing shelf and attach to wooden shelf brackets like this:


I also made 3 storage boxes from plywood to haul necessities back and forth to the cabin in:


I don't know about you, but I never seem to have enough places to put hardware.  So I made these two little screw caddies:


And here is my first attempt at half-blind dovetails on an upcoming project - a bookcase for the cabin.


For the cabin bookcase glue up, I had to have 3 new clamps.  So I made a funky little clamp rack to store them on that fit into the little bit of space I had left.  It attaches to the wooden shelf brackets with the screws you can see in the front, as well as two more pocket hole screws in the rear.


Also on the shop organization and storage front, I cleaned up a really messy corner where I had been stockpiling metal.  Or at least that was the original idea, but lots of wood ended up in the pile as well so I was guaranteed to never be able to find what I needed in there.  So I set up this little system for storing and organizing the metal.  It's just a little box made from scrap spruce, joined with rabbets and brads at the corners.  There are removable 1/4 inch plywood dividers installed in dadoes.  The upper divider is just a 2 x 4 ripped in half with some holes drilled in it to match the dividers in the lower box.  Dowels are inserted in the holes to correspond to the divider settings in the lower unit.


The wood and other junk that was in the pile was sorted, and some thrown away.  I installed a small shelf on a the bottom section of my lumber rack, as seen in this picture, to hold short stock I'm saving.  You can see the upper section is still in major need of some cleanup.