Showing posts with label Aaron. Show all posts

Sunday, June 2, 2013

New air compressor!


Posted by
Labels: ,

I finally got a decent air compressor today! I had a really cheap 1 gallon 120 psi compressor for a long time that was useless. The only thing I used it for was airing up an occasional tire on my car or trailer. I have been wanting to get a pin nailer and brad nailer for a while now but knew i didn't have a compressor that would run them, so I broke down and bought this.   


Specs:
4.5 gallon
5.0 CFMs @ 90psi
1.6 hp
200psi max


I picked this compressor because it had a higher CFM rating and PSI output than most of the other small compressors available at my local big chain store. I think this compressor will do all I need it too (run a small nail gun, air blower and maybe a small paint gun). 


I like that this unit is on wheels as well making it much easier to move around. Since I haven't used it yet i cant really review its performance but it seems to be quality for the price (around $300). I will do a review of it once I have used it a bit.


Thanks for viewing!


Saturday, June 1, 2013

Homemade Table saw fence system 2


Posted by
Labels: ,
In my previous post about my homemade table saw fence i ended with the fence temporarily installed to test everything. Next I remove all the pieces and painted them black.


I also dressed up the handle a bit. I cut the bottom at an angle and welded a plate over it. I also welded a cap over the end of the handle. 


Then I applied 3 coats of plasti dip to the handle to give it a more comfortable feel.


Next I put a strip of 3/4'' UHMW Plastic on the fence to act as the wear surface. I bolted it on with 3 bolts that are recessed into the plastic. UHMW works great on a fence because it is very flat and very smooth.


I also put some slick strip plastic tape on the T of the fence to help everything slide better. I got the slick strip  tape and the UHMW from Woodcraft.


I put the switch for the saw on the bottom of the fence rail. I like the switch here because it is easily accessible to turn the saw on and I can use my leg to turn the saw off. 


Once I got the fence perfectly square with the blade I tightened down all the bolts.


I put an outlet so i can hook my shop vac up and it will come on and off with the saw.


I made the pointer from a piece of scrap steel.


I bent the pointer down so that it almost contacts the tape measures to maximize accuracy.


I tied up all the wires with plastic clamps and tie wraps.


This is a very simple designed fence system that is easy to build. That being said it is a big job that takes a lot of time and some patients. Overall I am extremely happy with the finished product, the fence moves smoothly and is very accurate. The fence system was the weakest point on this table saw when i got it. It was not accurate and hard to use. Now I have a much better fence with 36 inches of rip capacity instead of 24 inches.


Thanks for viewing and I hope you enjoyed.
If you have any questions or comments please leave a comment or drop me an email.
Also if you like what you see consider subscribing to our blog!


Wednesday, May 22, 2013

Homemade Table Saw Fence System 1


Posted by
Labels: ,
I started working on my new fence system for my table saw last week and thought I would post a progress report. As I said in my previous post, I am using the same basic design that John Heisz used on his home made table saw project. John Heisz Homemade table saw fence


I picked up the materials needed for this project at the local steel yard for around $50. I got 10 feet of 2'' x 2'' steel angle and 10 feet of 2'' x 3'' rectangular steel tubing.


I started by mounting the angle to the saw using existing holes that were used to mount the old fence system. Next I attached a piece of the 2 x 3 tubing to the angle leaving a small gap for the fence to slide. I slotted the mounting holes so the fence rail is adjustable. This will allow me to get the fence perfectly square with the blade on the tablesaw.


Right now I just have a couple of bolts with nuts holding the tubing on. Later I thread the holes so i can just use bolts.


For the fence itself, I started by welding a plate to a small piece of the angle that was then welded to the bottom of the fence. The plate simply acts as a spacer to raise the fence a bit. I took special care to ensure this piece of angle was perfectly square with the fence before welding it in place.


I decided to try a different clamping mechanism on my fence. I used two heavy duty hold down clamps welded to a plate and attached to the back of the fence. These clamps were free so I figured I would give them a try.


I attached the two handles together and added one handle to control both clamps.


I don't have any welding equipment at my house but I do have access to a nice Miller TIG welder at work so that is what I used to do all the welding on this project.


The clamping system seems to work very well. When clamped down the fence is very rigid.


For the end to slide on i put a small piece of 1'' x 1'' angle in the end of the fence and cut out a slot in the bottom. I then bolted a chunk of phenolic to the angle for the fence to ride on.    


The basic construction is done but there is still a lot of finishing work to do so check back soon for more on my homemade fence system. I you have any question or comments drop me an email or leave a comment.


Thanks for viewing!
If you liked what you saw consider subscribing to our blog!


Sunday, May 12, 2013

Table Saw Upgrades


Posted by
Labels: ,


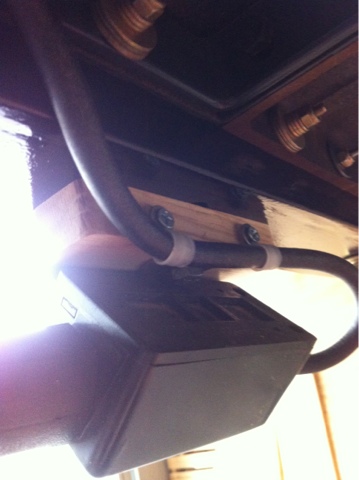
This is the out feet table I made for my table saw a little while back. This has worked well for me over the past few months but what has never worked all that well was fence system on this saw. This seems to be a common problem on many lower end contractor style table saws. The current fence clamps on both sides of the table so I had to leave clearance on my out feed table for the fence to slide. I have been wanting to either buy or make a new fence for some time now. I decided since i have access to all the metal working tools i need at work, I am going to build one similar to the system John Heisz made for his homemade table saw project. Since this fence will only clamp on one side of the table i can make an out feed table that butts up to the table all the way across. I am also going to make the fence rail longer to bring my rip capacity up from 24'' to 36''.  


I am adding additional rip capacity so i decided to add a side table also. Here is what I came up with for the tables. I will do an additional post on building the fence system.


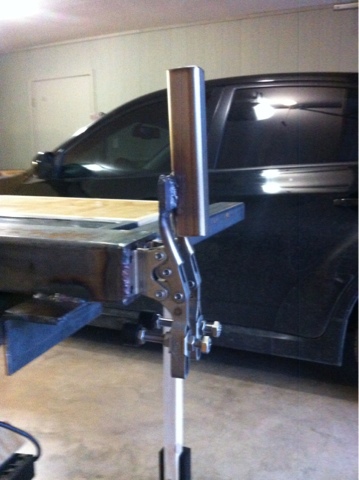
I started with some 2'' x 2'' aluminum angle that i attached to the back and side of the saw to act as a lip for the new tables to attach to. I slotted the holes to make the table adjustable so I could get it exactly flush with the table saw.


After the angle was installed with countersunk screws I made a brace from some scrap aluminum channel that I had on hand.


I cut a piece of aluminum to put on top so the wood frame would be supported by the brace.


Just temporarily installed with some regular screws.


Here is what it looked like once i put countersunk screws in everything.


Next I built a frame from 1'' x 4'' pine boards. I attached all the joints with pocket hole screws and glue.


The frame was screwed to the angle aluminum from the bottom.


Then I put plywood wrapped with pine edge banding.


The legs are just 2''x 4''s ripped in half with adjustable feet.


I made the feet out of scrap 3/4'' plywood. They are slotted and the leg has a hole drilled through it so the feet can be adjusted.


The slots extend out just like on my old out feed table.


I am really happy with how this project is turning out. This will make my table saw bigger and much more useful.


Thanks for viewing and hope you enjoyed.
Look for a post on building the fence soon!

If you like what you see consider subscribing to our blog!