In my previous post about my homemade table saw fence i ended with the fence temporarily installed to test everything. Next I remove all the pieces and painted them black.

I also dressed up the handle a bit. I cut the bottom at an angle and welded a plate over it. I also welded a cap over the end of the handle.

Then I applied 3 coats of plasti dip to the handle to give it a more comfortable feel.


Next I put a strip of 3/4'' UHMW Plastic on the fence to act as the wear surface. I bolted it on with 3 bolts that are recessed into the plastic. UHMW works great on a fence because it is very flat and very smooth.

I also put some slick strip plastic tape on the T of the fence to help everything slide better. I got the slick strip tape and the UHMW from Woodcraft.

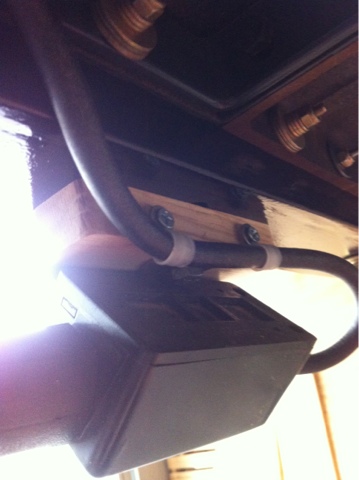
I put the switch for the saw on the bottom of the fence rail. I like the switch here because it is easily accessible to turn the saw on and I can use my leg to turn the saw off.


Once I got the fence perfectly square with the blade I tightened down all the bolts.

I put an outlet so i can hook my shop vac up and it will come on and off with the saw.

I made the pointer from a piece of scrap steel.

I bent the pointer down so that it almost contacts the tape measures to maximize accuracy.

I tied up all the wires with plastic clamps and tie wraps.
This is a very simple designed fence system that is easy to build. That being said it is a big job that takes a lot of time and some patients. Overall I am extremely happy with the finished product, the fence moves smoothly and is very accurate. The fence system was the weakest point on this table saw when i got it. It was not accurate and hard to use. Now I have a much better fence with 36 inches of rip capacity instead of 24 inches.

Thanks for viewing and I hope you enjoyed.
If you have any questions or comments please leave a comment or drop me an email.
Also if you like what you see consider subscribing to our blog!
<--- Soooo Jealous!
ReplyDelete