This Christmas, I received the last 3 chisels to complete my set of Narex bench chisels. I had seven chisels (1/4", 3/8", 1/2", 5/8", 3/4", 7/8", 1"), so the three I needed to complete the set were the big ones, 1 1/4", 1 1/2", and 2".
I was very pleased to have these new chisels, and I wanted to get them integrated into my hanging tool storage area over my bench with my other chisels as soon as possible. I have reached a point in my shop, though, where every new tool requires additional storage space I generally don't have.
This is the hanging tool space above my workbench. You can see that it's quite full, and more specifically there is no additional room to make a longer chisel rack. Suddenly what started out as just hanging up some new chisels is turning into a bigger project.
I really like having often used tools hanging on the wall for easy access, so I wanted to expand my hanging tool area. The plywood tool hanging area is pinned on either side by the electrical panel and the drill press/clamp area respectively, so the only option for expansion was to expand vertically. There was a shelf directly above the plywood, though, that would have to be moved. On this shelf, I had been storing a plethora of finishes, glues, oils, and other liquid products.
Longtime readers will recall that a while back I built a
sliding door shop cabinet. At the time I just threw whatever random tools and stuff that didn't already have a place to go in the cabinet.
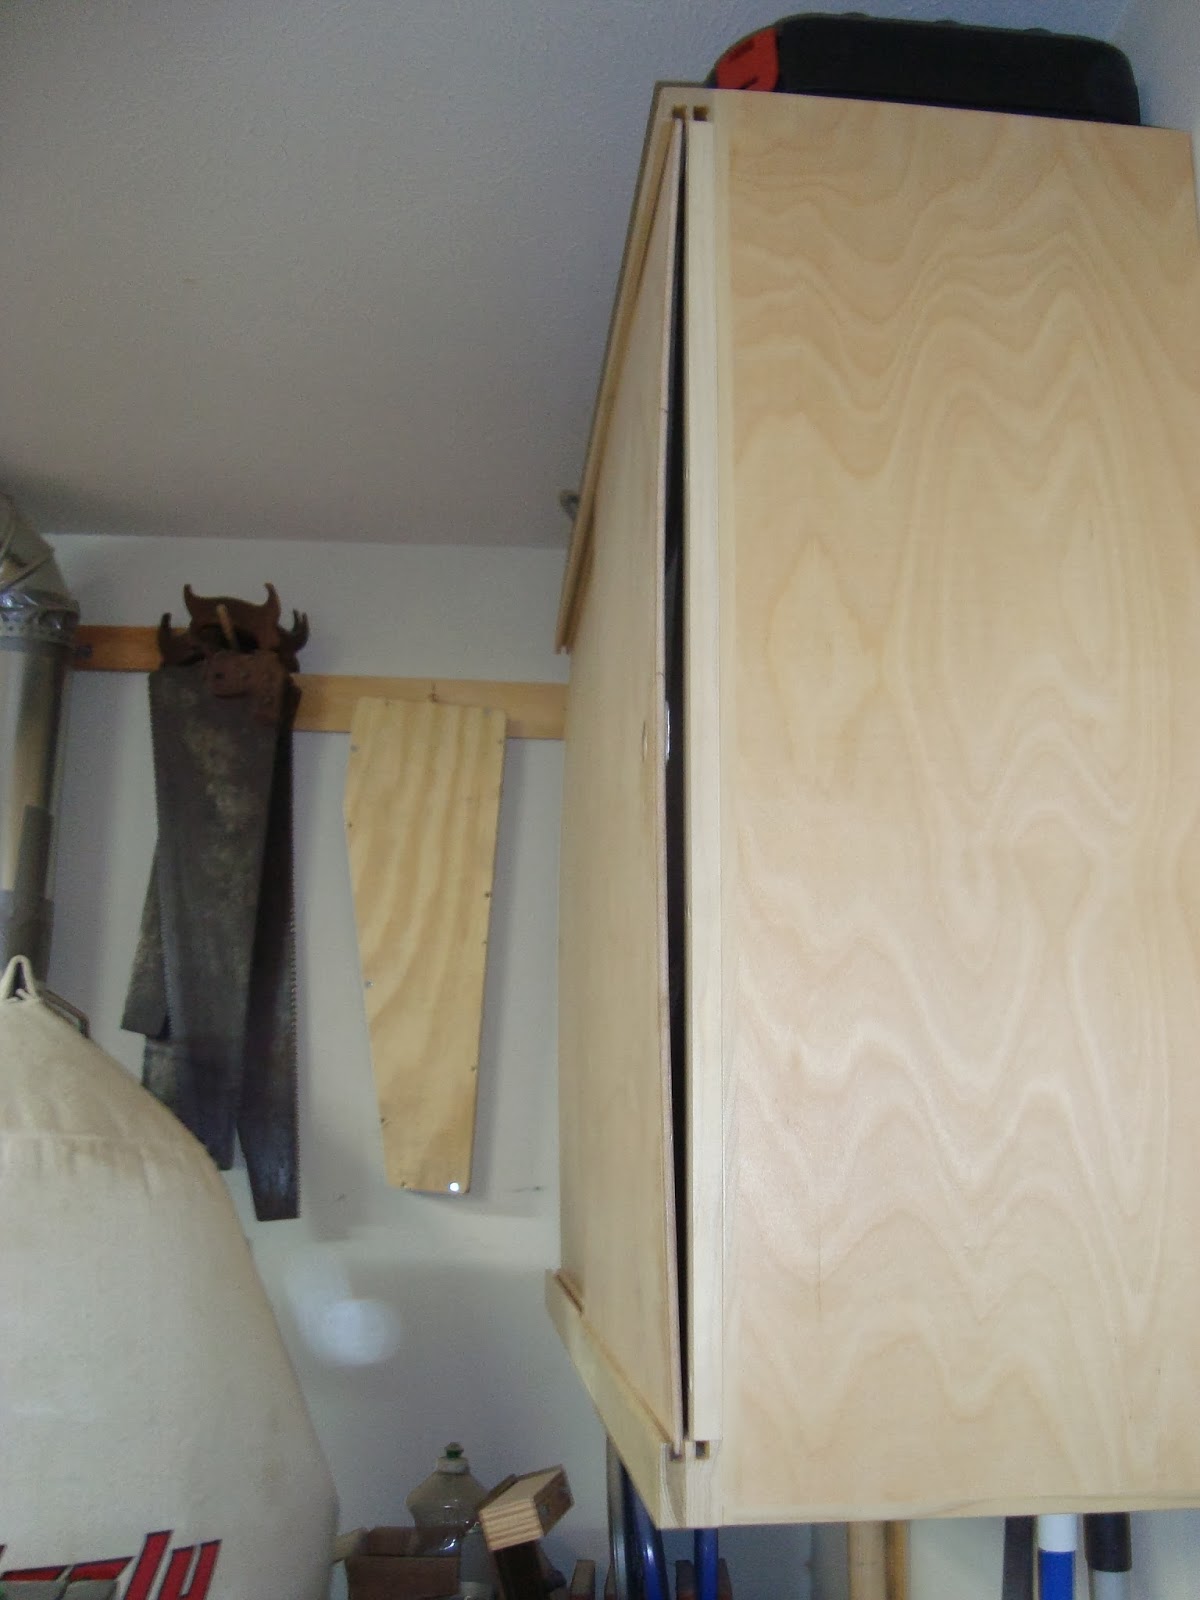
But my original intent was to eventually store my liquid goods in there. Readers may also recall that the doors bowed a little bit on the cabinet and left a gap on the side that I never have gotten around to closing in. Because of the gap, everything I took out of the cabinet was covered in a layer of fine sawdust. So I resolved to close up this gap before I moved on.
I started by ripping a piece of poplar to fill in most of the gap. I installed it with screws.
Then I needed something to fill the remaining curved gap.
I found this vinyl door bottom at the hardware store.
I trimmed it to length, and cut notches in it so it wouldn't interfere with the shelves.
The flexible vinyl conforms to the curved gap pretty well.
I then applied the vinyl to the other side of the cabinet as well. The gap was smaller here, so I didn't need the wood filler strip.
Here is a view of all the stuff out of the sliding door cabinet, as well as most of the stuff from the shelf I'm working on getting rid of. At this point, one wonders if all this will fit in that cabinet.
The shelf is cleared. It's odd to see it empty, as it has been crammed with junk seemingly as long as I can remember.
I did manage to get all the liquids, as well as my spray finishing gear, into the cabinet.
With the shelf gone...
And the tool hangers and tools removed...
The space is eerily empty.
To remedy that, I start working on making a new piece of plywood for the expanded tool hanging space. I went to Lowes to buy a piece of 3/4" plywood. My options were to buy cheap 3/4" sheathing which had pretty low grade surfaces for $25, or buy a piece of BC plywood for $35. I chose the $25 piece, and bought myself a whole lot of work smoothing it in the process.
I rip the plywood down to size with a skil saw.
You can see the printing on the surface that will have to be removed.
I do the heavy removal with a Number 81 scraper plane., then finish up sanding. I probably spent 2 hours on this scraping and sanding. Moral of the story - pay the damn $10 extra.
On to the next problem: there is a shelf just that is in the way of the piece of plywood on the first trial fit. It's the lower one in the picture below. I cut a little length off the end of the shelf with my jigsaw and a handsaw.
I want the plywood to extend above the bottoms of the shelf brackets for the shelf above it, so I need dadoes in the back of the plywood to allow it to sit over the bottoms of the brackets, but still flush against the wall. I hold the piece of plywood up in place and make marks on the top, which I then transfer to the back of the plywood.
I cut these freehand with a 3/4" straight router bit.
And the piece of plywood finally gets mounted to the wall with screws.
Now, finally I can make the new chisel holder. This is simply a board with holes drilled in it and slots cut connecting the front of the board to the holes.
Once I have this made, however, I realize that I need to give some thought to the arrangement of all my toolholders to accommodate this larger chisel rack. I start out by making a replacement for my mallet holder.
When I made this, I had a square headed wooden mallet. This holder
works for my new round headed mallet, but I quickly think up a better
design for holding the round head. The new one is a couple of pieces with half-holes drilled in them mortised and tenoned into a mounting plate.
As I start hanging the hand planes back up, I have a new plane laying on the bench that I recently purchased with some Christmas funds. This reminds me that I also have 2 other planes lying on a shelf waiting to be cleaned up and put into service. I need to have all the plane holders in hand, the old ones and the 3 new ones for these new planes, in order to come up with an efficient arrangement.
In order from left to right, a Stanley #140 skewed block plane (the plane I bought with Christmas funds), a Stanley #3 bench plane, and a Stanley #62 bevel up jack plane.
Incidentally, these are all pretty neat and somewhat unusual planes. The #140 I bought mainly to thin tenons. It has a removable side plate, allowing one to work all the way up to the shoulder, and a skewed blade to produce a better across the grain cut. The #62 is a somewhat unusual plane that high end manufacturers are copying frequently these days. It's basically a #5 jack plane sized body with a block plane blade and adjustment setup on it. The #3 is just a bench plane, but it's so small in size that it's somewhat unusual. In practice, it's just way to similar in size to the #4 to have both, but I just ran across it and it was too good to pass up.
All the planes above are already cleaned up, sharpened, and ready for use. The #3 in particular was pretty rusty and dirty, and the other two needed some pretty involved cleaning and de-rusting as well. The blades were almost all ground at the wrong angle from unskilled or careless sharpening, as I often find on old planes. I'm not going to go into great detail here, but it probably took me 6 or 8 hours to get all 3 completely ready for use.
With the planes themselves ready, I set to work making the holders. Longtime readers will recognize these as my usual design. I have a previous article
here if you are interested in how to make one. Here are all the plane holders, both new and old. The new ones are top left, first long one in from the left, and far right.
With the increased wall hanging space available, I also decided to finally get my combination square mounted on the wall. I made a quick hanger for it out of some scrap.
Finally, with all the hangers in hand, I work out final positions for everything.
I also hung up another Christmas present that I'm very excited about: a custom made drawknife from
JB's Forge! It's just hanging on nails for now, which works great.
You might be arriving at the end of this article wondering what exactly it was supposed to be about. I think sometimes folks who are not hobbiests or craftspeople (or crazy or whatever else you want to call us) often wonder just what in the world it is that we do in our shops all the time. After all, sometimes we work for weeks without any product that leaves the shop. This article just shows how one little project can be like a snowball that rolls down a long hill, gathering more snow and growing bigger all the time. Pretty soon what started out as just a desire to hang up 3 new chisels can end up taking a week's worth of nights and the following weekend in the shop!