Tuesday, April 15, 2014

Backyard Shed: Part 2


Posted by
With the blocks done, I began construction of the shed itself.  The first step was to create the notches in the vertical posts to receive the horizontal frame members.  I started with the four back posts.  I made the notches using a technique I've seen many times.  The first step is to cut a series of kerfs in the post with a skilsaw.  The depth of these cuts is the same as the target depth for the eventual notch.


Then I just take a hammer and knock out the waste.  If you've never tried this technique, you'll likely be surprised at how well it works.  The resulting notch only requires minimal cleanup with a chisel.


Here are some finished notches cut into full length posts.  The next step is to figure out how long the posts need to be.


 First, I need to set the four blocks for the back wall.  I dig just a couple inches to get below most of the turf and roots.


Then I run a level string at the height I want the posts to to be.  I measure from the bottom of the post socket to the string to get my total post length.  Then I just measure from the top (above the top notch) to the length required, mark, and cut the posts.


With the posts cut to length, I take a few quick passes over all four sides with a hand plane to ensure they don't fit too tightly into the post sockets.


I set the posts in place, and drill through the post using the cast-in hole in the blocks as a drill guide.


Then I place a pin all the way through the block and the post.  I made these pins out of 1/2 inch rebar.  I formed a head on one end by heating it in the forge and peening it over.


The other side of the post is secured with a smaller pin through a hole in the rebar pin.  These smaller pins I made by bending some pieces of the leftover remesh from when I cast the concrete blocks.


With the back posts in place, I start putting the horizontal members in place.  


This requires constant checking with the level.


The horizontal members are attached with 3 inch deck screws.


 Once the rear wall is assembled, it's time to plumb it.  The fence itself isn't necessarily plumb, so on one side of the wall I place a 2x4 block halfway down the wall to lean the wall out from the fence...


And on the other side I have to use scab boards to lean the fence back so I can lean the wall towards the fence further than where the fence originally was.


Once the wall is plumb, it's time to determine the location for the front corners.  I do this by measuring out from the back corners, then measuring the diagonals and tweaking until I reach square.  This is tedious and it sometimes seems like  you're not making progress for a bit, but you have to stick with it and get it right before you move on.  I dig oversize areas for the front corner blocks to give myself a little room to move them around.


I place some cutoffs in the sockets to give me something to hook the measuring tape on while measuring the diagonals.


Once the locations for the front posts are determined and everything is as square as it's going to get, I begin working on determining the length for one corner post. To do this, I get the post in place and use scabs to get it plumb.  Then I attach a temporary board to the back wall and level it with a level.


This board is level with the top of the topmost horizontal frame member on the back wall which will function like a plate for the rafters to sit on.  Once it is level, I make a mark on the front post, which you can see already has the notch cut in near the top for the front header/plate.


Then I can take this board down, and the post down, and use my mark to determine how much of the post to cut off the bottom.  I know I want the roof to have one foot of elevation change from the front to the back, so I measure from the mark I made with the temporary board to the top of the notch.  This difference should be one foot to give me the elevation change I want, so the amount I need to cut off is the measurement from the line to the top of the notch minus the one foot.


The top of the post is cut off to match the slope of the roof, just to make it look nice.


I do the same procedure on the other side, and run all 3 horizontal frame members around the sides.

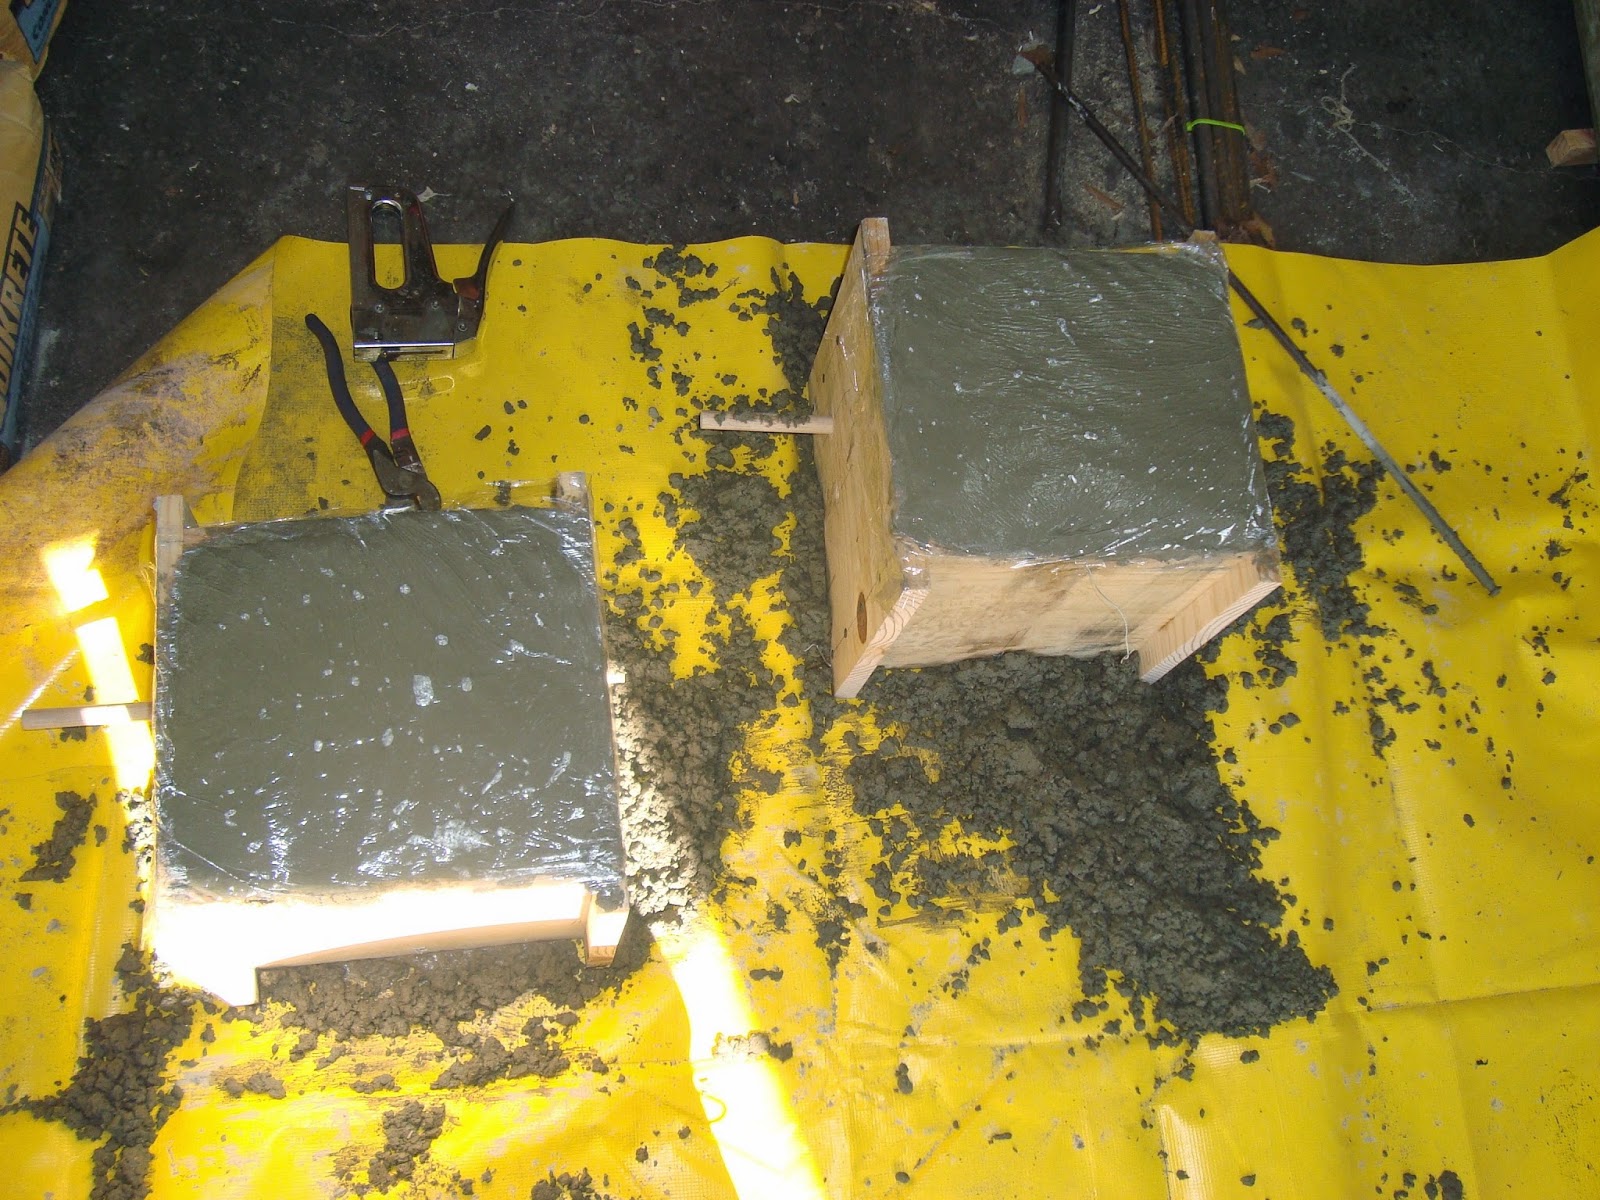
Next I set to work on the two middle posts in the front wall.  Here I hit a not altogether unexpected, but still very unpleasant giant ball of roots while digging the first middle post hole.  It's the hole you can see in the center of this picture.  I didn't take any pictures while digging the actual hole, but all the light colored things you can see in the foreground are wood chunks from the roots.


Here is a top down picture of the same hole.  You can see all the roots I hit in the top right of the hole.  In the process of chopping out the roots, the hole got a little deeper than I wanted it to be, so I put a paver in the bottom to counteract some of the depth.  The block just sits on top of this paver.


 Once the holes for the middle posts are dug, I set the blocks in place and determined the post lengths using a level string stretched between the corner posts, cut them to length, and set them in place.


You can see the front header/plate is also put into place in the notches of the front posts and attached with deck screws.

At this point, I was tired from fighting tree roots and time was running short, so I didn't do a good job documenting with pictures.

I ran the 2 remaining horizontal framing members between the middle two front posts, and then began attaching rafters.  The rafters are cut from 2 x 4s, and attached with 1 5/8 deck screws and these little plates that I think are called hurricane ties.


The last rafter on each end is attached to the side of the posts with screws, and then the strapping 1x4s are attached to the top of the rafters with screws.


 \

 At this point the framing is complete, and it's time to attach the metal roofing and siding.  Here again, I did not do a good job taking enough pictures.

The metal roof begins with attaching the back trim.


And then the side trim.


Then the roofing panels are attached.


And then the front trim is attached.
 

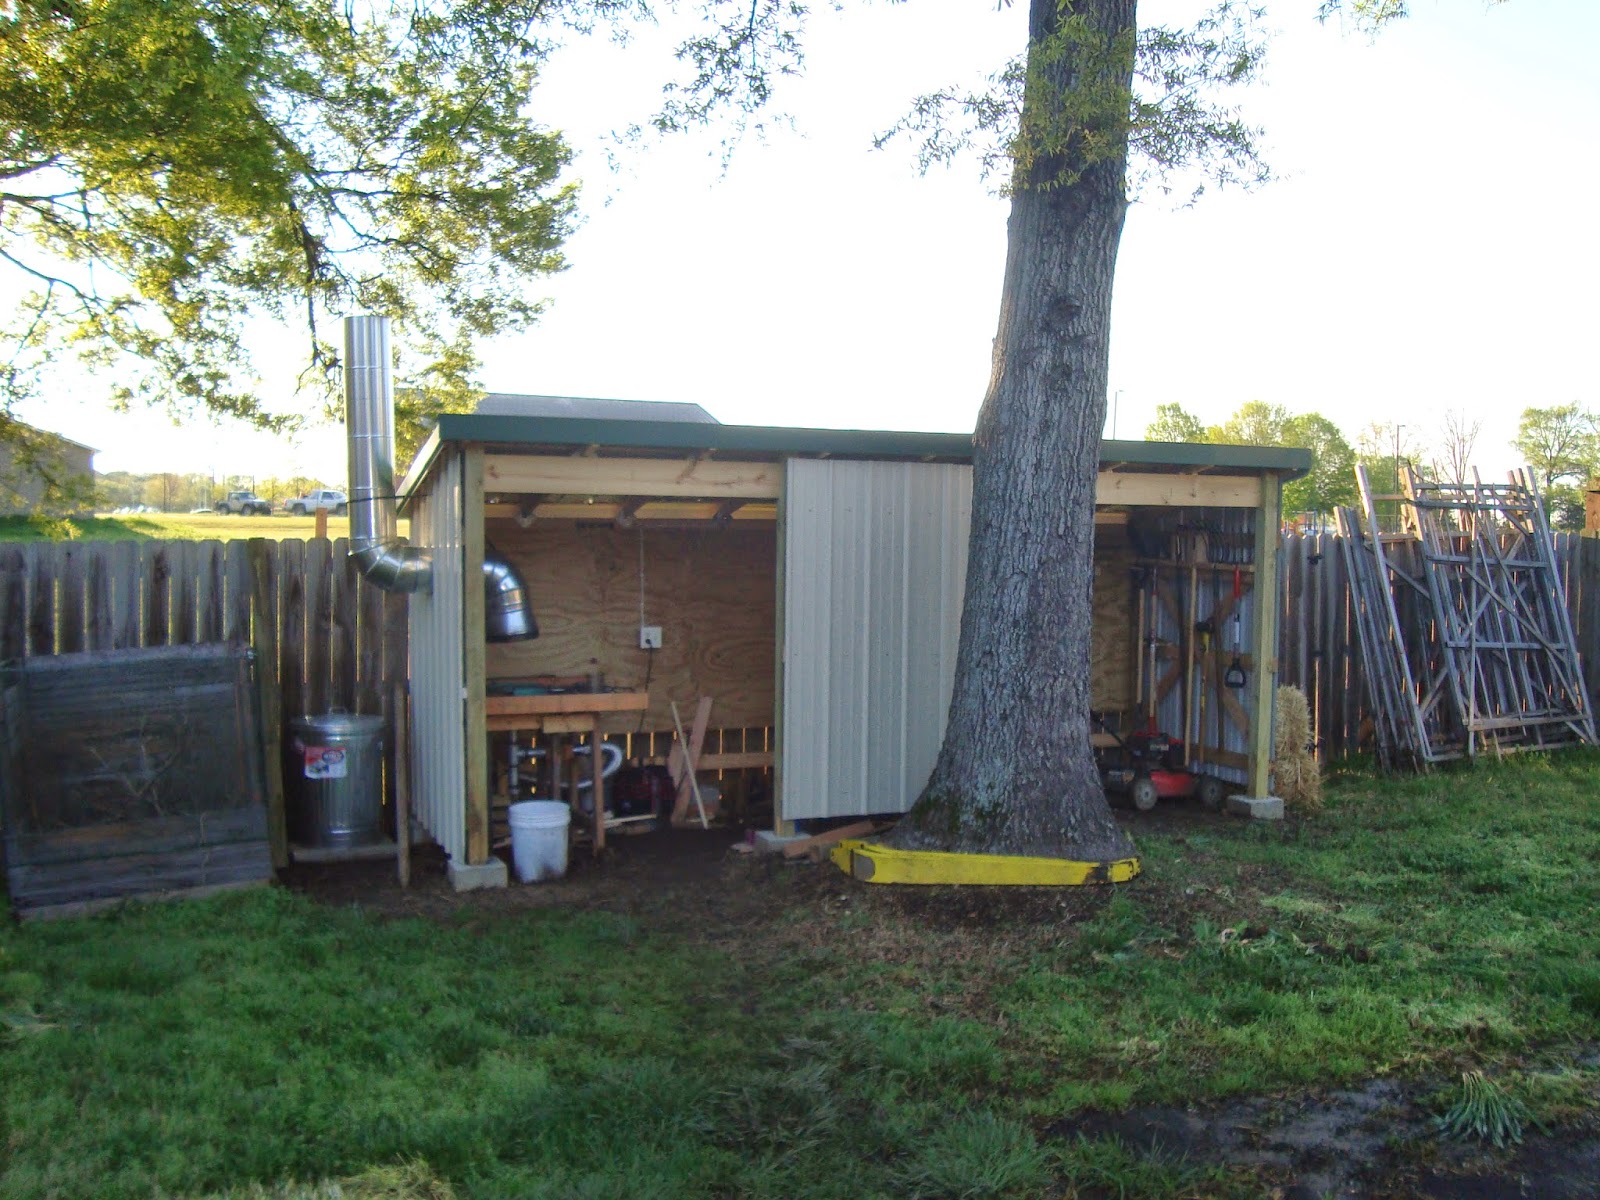
The metal I'm using for siding is also sold as metal roofing.  I attached it only to the two small sides and the area in between the two middle front posts.  The back wall of the shed is enclosed by the fence.


All in all, I think this was a fairly inexpensive shed build while being very structurally strong.  I spent right about $700 dollars on concrete, fasteners, metal roofing and siding, and wood.  The shed is 5' x 16', for a total enclosed area of about 70 sqft or about $10 per square foot.  You can buy premade sheds at Lowes or Home Depot cheaper, but they are nowhere near as strong structurally.  Also, if you had the room, you could expand the 5 foot dimension of this shed out to 8 feet without much cost increase. Besides casting the blocks in place like I described in the conclusion of my previous post, I don't think I'd really change anything else about the construction of the shed if I had it to do over again.  I all really went great and turned out very much like I'd hoped.


Tuesday, April 1, 2014

Backyard Shed: Part 1


Posted by
My workshop has recently grown to include a small amount of metalworking equipment - specifically an oxy/acetylene welding setup.  The shop was already bursting at the seams since it stores all my woodworking equipment, as well as a car and a motorcycle.  On top of that, all the yard tools are stored in there as well, including a pushmower, a tiller, a wheelbarrow, and a dozen handled tools like shovels, rakes, and hoes.  All this in a pretty typically sized 2 car garage meant that even adding any big tools just wasn't possible.

I have been wanting to build a shed in the backyard for some time to store lawn tools.  This would get them out of the workshop and free up some space.  Like most folks, I have a long list of projects, though, and this one has been put off time and time again.  But, in light of the newly exacerbated overcrowding, I decided to make the shed bigger to allow for a metalworking area.

My backyard is a good size, but we already have some dedicated garden space back there that left me with really only one viable location for the building, a space along a fence in between the fence and a tree.  This tree limits one dimension of the building to only 5 feet.  The only thing I could do to increase the size was to lengthen the building along the fence.  So I picked a length of 16 feet.  This was about as long as the space in the yard would allow, and I think it will give me enough space to store the things I have in mind.

I started with a sketchup model that included a representation of the fence and the tree.


The design of the building is basically a pole barn, but I knew from when I built my fence that there were too many buried wires in that area of the yard for me to bury the posts like one usually would for this type of building.  So, that led me to my first design challenge - how to build this type of building without setting posts in the ground.

There are probably many ways one could do it.  I knew I didn't want to pour a concrete slab, which would probably be a typical way to solve this problem; that would add too much expense and complexity to the project.  I considered using the concrete deck blocks they sell at every home center - here is an example.  These honestly would have worked fine, I'm sure, but I wanted a more customized solution.

I decided to cast my own concrete blocks that would have a socket for the post, similar to the commercially available ones, but without the four notches opening the socket to the outside.  I also wanted a way to attach my blocks to my posts, to provide a little extra security.  To that end, I wanted to cast a block with a hole going right through the socket and the sides of the block through which a pin could be inserted, tying the block to the post.

I wanted two different block designs, one for the posts in the front of the shed, and a different one for the posts in the back of the shed.  The posts for the back of the shed would have the socket for the post in the middle side-to-side, but adjacent to the back of the block to allow the post to sit right up against the fence.  I started my block making crusade on these back posts.

I started with some low grade 1x12 boards that Lowes sells as "shelf boards."  I cut them down to size...


Then drilled holes


And screwed them together


Then I started working on the part of the mold that would cast the hole for the rod.  These two molds were intended to make both the front-of-the-shed and back-of-the-shed style blocks, and I made the setup for the front blocks first.  You can see the dowel is centered for the front block design in this picture.


Then I cut a couple of 6 inch blocks and bored 5/8" holes to match those in the side.


Here is the mold assembled for a front block setup.


As an afterthought,  I stuck on a couple of shims to ensure the cast-in hole was a bit bigger than the post so the fit isn't too tight.


Here are the two molds with the post stumps in the position for casting the back-of-the-shed style blocks.  (They're sitting upside down in this picture)


I also put a U-shaped piece of concrete reinforcing mesh in these to strengthen them.


I mixed up some bagged quikrete in a wheelbarrow.


And put it into the two molds to cast the first two blocks.


And here's what block number one looked like when it came out.


And block number 2.  The wooden dowel I used to cast the hole for the rod absorbed a lot of water during the casting and stuck and eventually broke off.  I ended up breaking the corners off this block while trying to drill and hammer the remaining dowel out.


For my next round of casting, I switched to 5/8" metal rod.  Here are the second 2 back posts in the mold.


This is how I removed the stumps for the back post design.  They stick somewhat to the concrete, but since they are open on one side you can just hammer them towards the open side.

I made a second mold that is two blocks side by side.  It is set up for the front block design with the rod in the center in this picture.


The post stumps in the front block design are completely surrounded by concrete, and I pretty quickly realized I was in a mess.  I really didn't make good provisions for getting these stumps out, so I ended up going through a pretty miserable process of drilling and chiseling them out. 


I made this curved chisel in my forge out of a piece of cultivator spring I scavenged to help with digging this stump out.  Oh yeah - I have a forge now if you didn't know.  A big thank you to Justin of JBs Forge for getting me into the hobby of blacksmithing!


Here is one of the blocks after the stump removal.  You can see burn marks from where I got desperate and tried to burn the stump out with a torch.  That did not work at all.


After the absolute drudgery of drilling and chiseling out the two stumps from the first two front blocks, I decided to try something else.  I made a wooden box the size of the post stump out of 1/4" plywood and some spruce scraps.


I stuck this on a little metal base I made by tack welding a piece of 5/8" rod to a piece of metal plate the size of the bottom of the wooden box with construction adhesive.   The idea of the piece of rod is that it allows you to drive the whole thing out from the bottom of the block once it is cured, and doubles as a drainage hole in the finished product.


Here is the assembly with the holes drilled ready to go.


I also made a similar box out of some scrap metal just tack welded together.


For the last two blocks, I rigged up the double mold again to try the two different box assemblies side by side.  Here they are ready to go with the reinforcing mesh already in place.


Finally, I mixed up the last of the concrete and cast the last two blocks.


Once they are done, I drive out the wooden box from the bottom.  You can see it coming out from the top as I drive from the bottom of the block.


It came out fairly cleanly and quickly, although you can see it did break out a small area around the top of the hole.


You can see the metal bottom bent on the way out.  I guess it caught in the concrete somewhere along the way.


Next I drove out the metal one.  It was much, much harder to get out.  I pretty quickly broke the corners of the box loose at the top hoping this would help.  In truth, it didn't.


I expected the metal box to work better than the wooden one, based on my experience with metal rod vs dowel for casting the hole.  I can only guess that maybe the box was slightly tapered, with the bottom of the box slightly larger than the top.  That would explain why it was so difficult to get out.  My tools and skills for working metal are much less accurate than they are for woodworking, so perhaps my wooden box was just much more square and straight.

Since the last two front blocks I made had a drainage hole formed by the stub of rod I used to drive out the boxes, I drilled drainage holes in the other two front blocks.  I guess concrete bits aren't really meant to drill through holes.  The tip of the little cutter at the end of the bit broke right as it exited the other side of the hole.  I broke one bit per hole, but it's fair to point out these were cheap bits that probably came in some cheap combo set.


Casting these blocks was really a long, arduous process.  I took me two weeks, working nights and weekends on it.  If I was faced with this same dilemma of wanting to build a pole style building but not being able to dig holes for the posts again, I think I would form and cast the blocks in place with the posts already in them.  I would dig my spot flat, then put a paver in, then place the form on top and the post inside the form.  Then I'd rig supports to hold the post level, and pour in my concrete.  I think this would be simpler and give you better results, and with the benefit of hindsight, I don't know why I didn't think to do it this way to start with.  But regardless, I learned a lot along the way and in the end I did successfully produce blocks I could use.

If you enjoyed this article, subscribe so you don't miss the upcoming articles about the rest of the shed construction!  Check the top right of the page for email subscription as well as rss/atom.