After our move, we immediately needed more storage space, mainly for yard tools and supplies. Our mower, tiller, atv, and other yard tools were all sharing floor space with my shop, which left me with little room to work. I decided to build a shed over an existing concrete slab on our property. The slab was old and not level so I designed the shed as a pole structure around the slab. That way the shed didn't actually connect to the slab in any way, and could be more easily built level.
I set the poles as step 1.
Once the poles were set, I had to establish a level line across all the posts. I used the simplest possible type of water level for this. It's just a clear tube on either end of a water hose.
You can see the water level stretching from the far right corner to the far left corner.
Then I cut notches to create ledges for the headers to sit on.
Here the headers are going up.
Rafters up next...
Headers around the sides now as well.
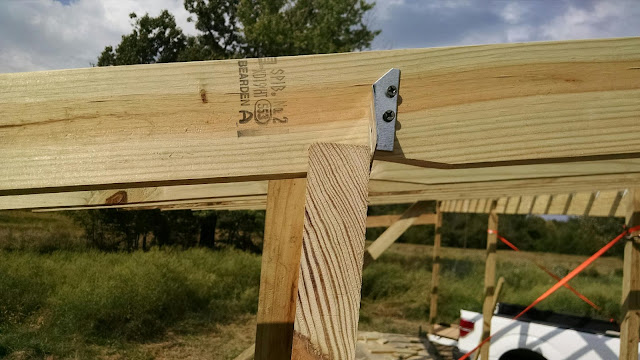
All the rafters are notched to sit on the headers and attached with rafter ties.
Next I got some help from my brother and got the metal roof installed.
This slab was constructed in a manner I had not seen before. A layer of large native stones was first dry-laid into the rough shape of the slab. Then a 3 or 4 inch layer of concrete, heavy on the aggregate, was poured level over the large stone. Lastly, a 1 inch or so layer of mortar (with no aggregate) was poured over that and troweled out to create the surface. The edge of the slab that was going to be the front of my shed was not covered. I wanted to enclose this in concrete to make it look nicer and strengthen the front edge.
Here I have formed up to pour the concrete.
I put more metal roofing material on the back, and sides of the shed.
Here the shed is finished. You can see the front of the slab turned out pretty good, especially considering my lack of experience. The red corner trim (also metal building material) really dresses up the building. This is a drop in the bucket in the total expense of the building, but really gives it that professional touch.


