I picked up the materials needed for this project at the local steel yard for around $50. I got 10 feet of 2'' x 2'' steel angle and 10 feet of 2'' x 3'' rectangular steel tubing.

I started by mounting the angle to the saw using existing holes that were used to mount the old fence system. Next I attached a piece of the 2 x 3 tubing to the angle leaving a small gap for the fence to slide. I slotted the mounting holes so the fence rail is adjustable. This will allow me to get the fence perfectly square with the blade on the tablesaw.

Right now I just have a couple of bolts with nuts holding the tubing on. Later I thread the holes so i can just use bolts.

For the fence itself, I started by welding a plate to a small piece of the angle that was then welded to the bottom of the fence. The plate simply acts as a spacer to raise the fence a bit. I took special care to ensure this piece of angle was perfectly square with the fence before welding it in place.


I decided to try a different clamping mechanism on my fence. I used two heavy duty hold down clamps welded to a plate and attached to the back of the fence. These clamps were free so I figured I would give them a try.

I attached the two handles together and added one handle to control both clamps.

I don't have any welding equipment at my house but I do have access to a nice Miller TIG welder at work so that is what I used to do all the welding on this project.

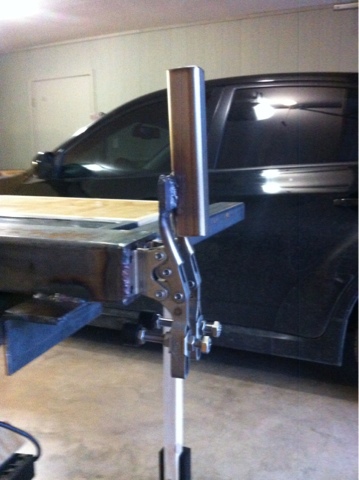


The clamping system seems to work very well. When clamped down the fence is very rigid.


For the end to slide on i put a small piece of 1'' x 1'' angle in the end of the fence and cut out a slot in the bottom. I then bolted a chunk of phenolic to the angle for the fence to ride on.


The basic construction is done but there is still a lot of finishing work to do so check back soon for more on my homemade fence system. I you have any question or comments drop me an email or leave a comment.

Thanks for viewing!
If you liked what you saw consider subscribing to our blog!
You really did an amazing work here, Aaron! Everything is organized, fairly meticulous and well-planned. I also like how you improvised and managed to have welding equipment to finish this project with, by borrowing a bit from your office. Thanks for sharing!
ReplyDeleteArthur Greene @ Central MM