I actually worked this design up in sketchup some months ago, but it's just been on the back of the project queue for a while. I chose the curved shelves to maximize the use of that corner cabinet shape, and the slots at the bottom are for mail!
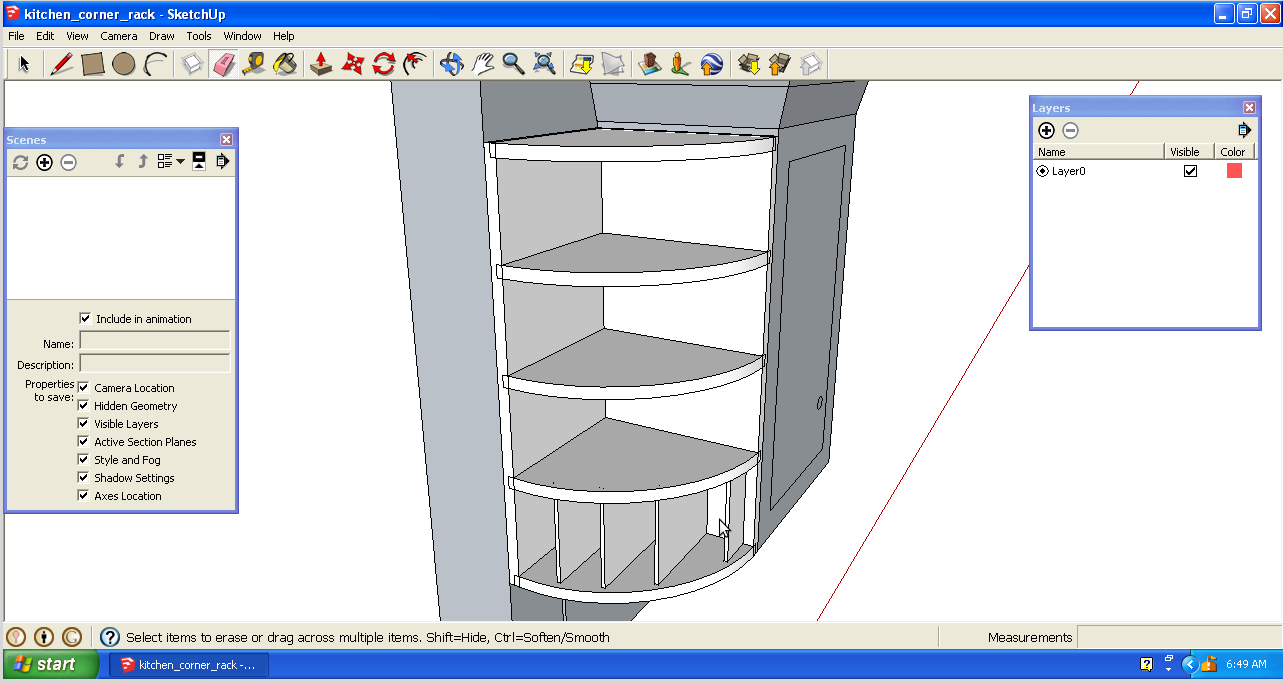
Sketchup Link
Luckily, I have all the plywood on hand to do it. I'm using the leftover "blondewood" plywood from my cd storage cabinet project. I start out by cutting out the two back pieces. These have dadoes for the inner shelves, rabbets for the outer shelves, and the two back pieces themselves fit together with a rabbet. I cut all these on my tablesaw. The rabbets I cut just using a standard blade in two passes.
As usual, this 3/4 inch thick plywood is not actually 3/4 of an inch thick, and I couldn't get a set of chip breakers and shims from my dado blade set to cut the right width for a good fit, so I cut these in two steps. First, I cut the outer bounds of the dadoes with my standard blade using my table saw sled and a stop.


Then I swapped out for an undersized dado blade stack and removed the remaining waste. This whole process was kind of a pain, and I would probably try harder to make the dado stack work in one pass if I had it to do over again.


I laid out the curved shape for the shelves using a thin piece of oak. Such a piece of wood is often used with a string, forming a "bow" for laying out curves.

In this case, though, I dry assembled the back pieces and shelves using clamps, and then clamped on the thin oak strip to trace the curve.


Then I rough cut the first shelf on the bandsaw, and sanded to the line on the disc sander.

I made the other shelves by using the first shelf as a pattern. I traced the shape of the first shelf onto each additional shelf, then rough cut it on the bandsaw. Then I stuck a rough shelf to my pattern shelf using carpet tape, and routed the final shape with a flush trim bit at the router table. I ended up making 2 of the shelves out of mdf that was previously painted purple because I ran out of the plywood and had the mdf on hand. Since it will all be painted, it shouldn't be noticeable.


I cut the slots for these dividers at the router table. I used the fence and stop blocks. Since the slots are cut on opposite faces of the two shelf boards, I had to move the stop blocks back and forth for each cut. It also made every other cut a back-routing situation, so it was hard to keep the bit from wandering on these cuts. This was time consuming, but produced good results in the end.


I decided to fully pre-finish this project since it would be difficult, if not impossible, to get paint in those slots after assembly. I have a love-hate relationship with pre-finishing. I really hate all the prep (taping off glue joints), but it can produce great results. You can see more of that mistint purple paint I used for the backs of the cabinet, just to use some more of it up.


I finished this project with white latex paint, top-coated with water based clear polyurethane, just like on the cd cabinet. But I did put into practice a lesson I learned during that project and gave the latex paint several days to dry before I put the clear on top. This approach worked, and I haven't seen any signs of the checking in the clear top coat that I got on the cd cabinet. I brushed on the latex paint, and sprayed on the clear topcoat. After all the finishing, I removed all my tape and carefully glued up the project, taking care not to mar my finish with my clamps. Of course I did end up with a few spots of finish that needed touching up after assembly. The most noticeable of which was that I taped off the top instead of the bottom edge of the top shelf. This kind of stuff happens to me every time I prefinish something, and it's a big part of the reason I hate doing it.

So I scrape off the paint on the bottom edge of the shelf with a knife for the glue surface and paint over the gap at the top after assembly. Ugh.

Then there's also the inevitable gaps around joints after assembly that have to be touched up with paint.

After touching up the paint, I install the cabinet with drywall screws countersunk just below the surface.

Then I fill with drywall compound and then "sand" down with a flat wood block covered by a damp washcloth. This works great, and doesn't make a mess in the house. Just rotate to a clean section of the rag for each screw hole.

Here is the full finished rack in place! You can still see part of the junk pile I mentioned at the beginning of this article in the corner under the shelf.

Looks great as always!
ReplyDeleteThanks, glad you enjoyed it!
ReplyDeletebagus.....kayunya selalu baru?....atau total kayu bekas?lebih bagus lagi selalu manfaatkan kayu bekas karena agar hutan kita lebih cepat lestari yang berimbas pada perbaikan lapisan ozone-kalau ditempatku semuanya pakai bahan dasar bambu dan hasilnya sama-tapi sayang pengerjaan lebih lama-ntar mau shering aahhh
ReplyDelete