I came up with a simple, if strange bracket formed from two pieces of scrap pine.

The two pieces are joined with a mortise and tenon. I usually form the mortise first and then make a tenon to fit, but for some reason I did it the other way around this time. I made the tenon on the tablesaw. I first cut the shoulders using the rip fence as a guide.


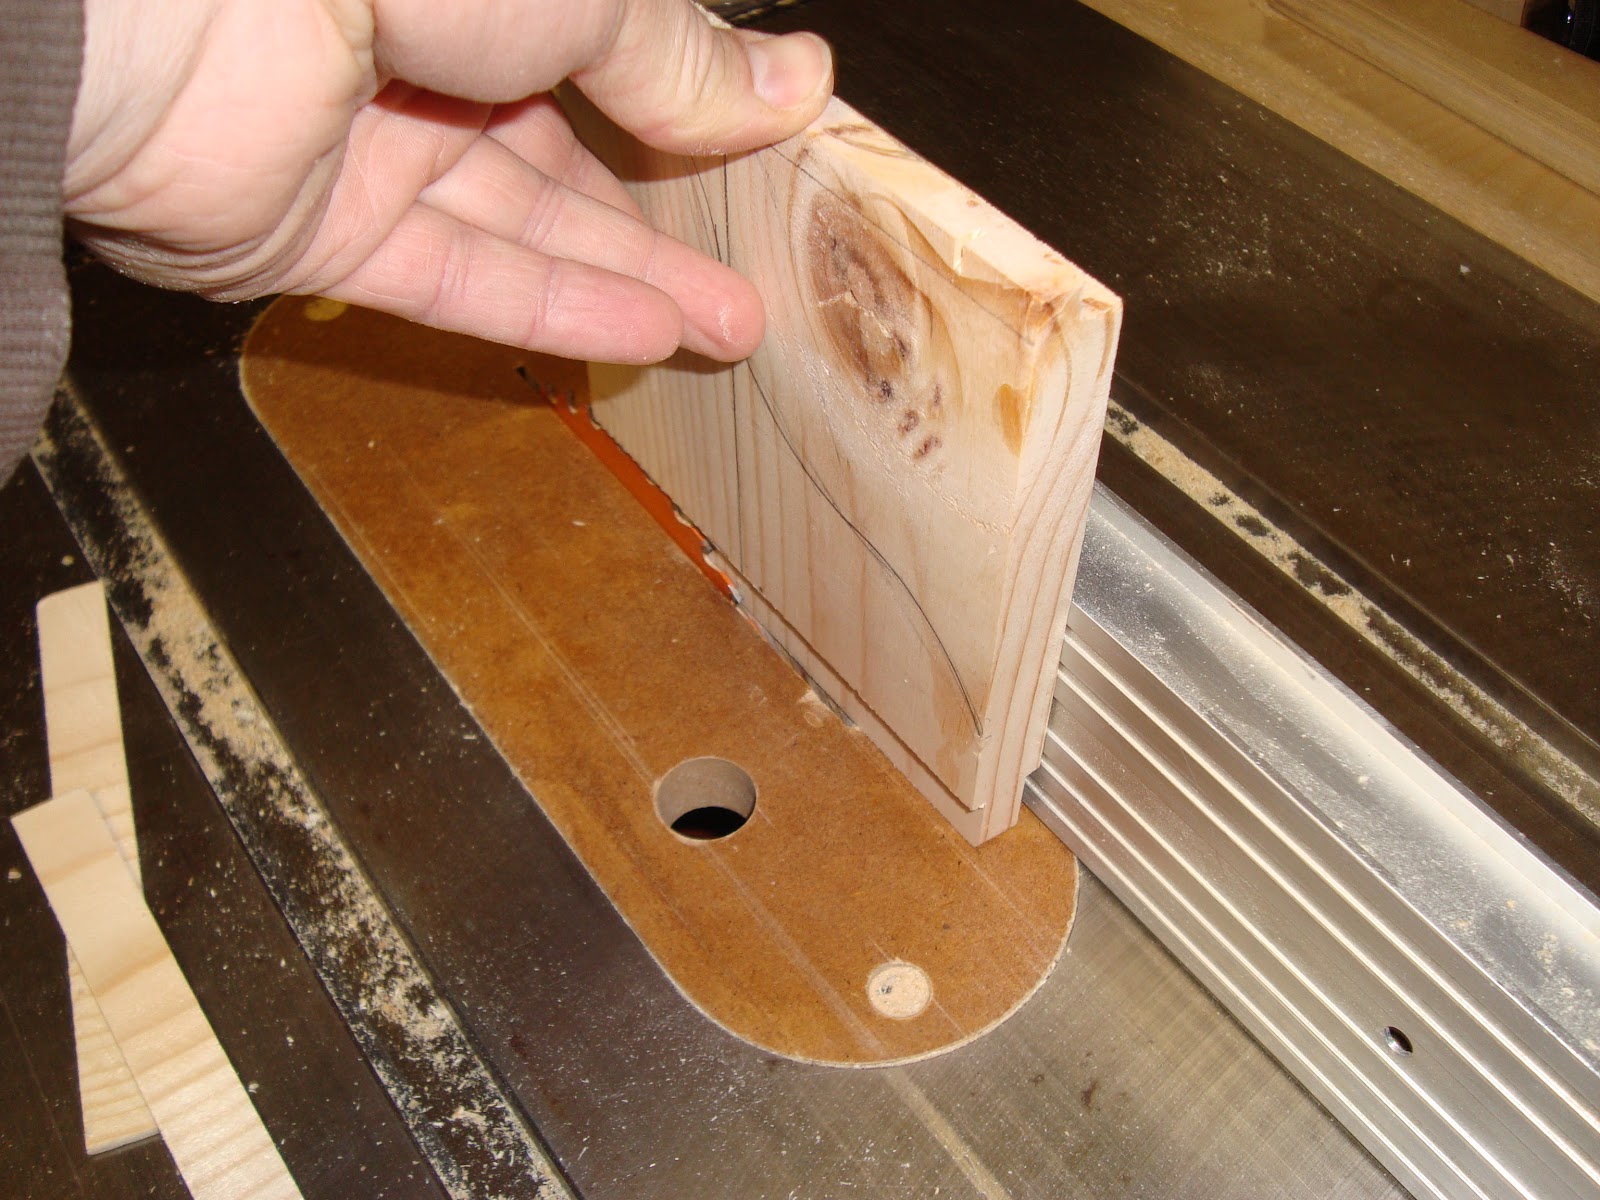
I then cut the cheeks with the piece on end. This picture is only for demonstration and the saw is off; when I cut this for real I use both hands. One hand holds the piece against the fence, and the other holds it down and presses it through the blade.
I trimmed off the excess from the area that becomes the vertical offset, and laid out a curved shape by tracing an old round food container in 3 different positions.


I then formed the mortise in the vertical piece. I drew the mortise out in pencil, then drilled a series of overlapping holes at the drill press with a forstner bit.

I used a chisel to smooth the ridges in between the holes and square up the ends. Usually I round the ends of the tenon to match the rounded hole left by the drill bit, but this time I didn't for some reason.

I drilled a couple of pocket holes with my Kreg jig to attach the shelf bracket to the T bracket of the under shelf drawers.

I glued up the mortise and tenon. You can see from the back that it's a pretty good fit, despite the fact that it was made quickly and hand fit.

Here is the bracket installed. Mission accomplished.

No comments:
Post a Comment