
Sketchup File
I'm circling back around to finish up the wooden toolbox extension (parts 1 and 2). In this article, I'm making the drawers to utilize the empty space in the toolbox extension. I am going to build two shallow drawers for the section above the middle shelf, and a much shorter drawer to fill out the bottom section in front of where the torque wrench goes. I am sticking to only using wood I have on hand for this project, just like I did in the previous two articles, but I am purchasing ball-bearing drawer slides for the two larger drawers.
Here are the drawer slides I decided to go with:

In my experience, a common weakness in ball bearing drawer glides is the tiny mounting screws they come with. These came with much nicer screws than I've generally seen. They are a solid 1/2 inch in length.

The slides are from Lee Valley, and they're 12 inch long full-extension 75 pound capacity slides. (Link to drawer slides at Lee Valley). The drawer carcasses themselves weigh very little because they are made out of pine, and the drawer bottoms are 1/4 inch hardboard, so I'm not very worried about exceeding the weight limit, even when loaded with tools. I'm not planning to pack these drawers with heavy sockets or wrenches.
To make the drawers, I follow a process I've seen numerous online woodworkers use, including Matthias Wandel (www.woodgears.ca) and Steve Ramsey (www.woodworkingformeremortals.com). Specifically, I first learned about this very simple method from one of Matthias's articles:
http://woodgears.ca/workbench/drawers.html. I am joining the drawer front and back to the drawer slides with rabbets cut into the front and back, then installing false fronts over the drawers.
To begin, I find some pine in my stockpile big enough to make the drawer carcasses. I rip all the stock down to 3 inches wide and then cut everything to length using the tablesaw. To cut the rabbets, I first ensure my blade is set at the right height and my fence at the right depth using my calipers. For me, calipers are really essential measuring tools.


I cut these rabbets in two passes. First I crosscut to one half the material thickness depth with the outside line of the cut falling at once the material thickness in from the end. I do this using both the miter gauge and the rip fence since it is not a through cut.

I then swap the two dimensions of blade setup. I now make a rip cut of once the material thickness in depth with the outside line of the cut falling at one half the material thickness. The board is passed over the blade on end, using the rip fence as a guide.

This is arguably a dangerous cut on the tablesaw, and would be best performed using a tenon jig. I don't have a tenon jig, and to be honest I've probably cut 20 or 30 of these rabbets in this fashion without incident. However, if you have the proper equipment, by all means, use it. And certainly be careful if you elect to attempt this method yourself, keeping your hands as far from the blade as you can while maintaining solid control on the workpiece. A taller auxiliary fence clamped to your main fence would also be advisable.
Once these cuts are done, I make a groove for the bottom to go in. Here I deviate slightly from the woodgears article I referenced before. I have made drawers with the plywood bottom glued and nailed to the bottom of the drawer front, back, and sides exactly as he describes before, and never had one fail. However, I don't find the grooves hard to make, and I think they make for a neater looking drawer.
To make the grooves, I just use my rip fence and standard tablesaw blade and make a number of passes. I typically make the grooves one half the material thickness.


I really like making drawers this way, because it only requires the use of your standard tablesaw blade. All the cuts are made on just the tablesaw, and once you get the hang of making them this way, you can do it very quickly.
I cut the bottoms to fit out of hardboard. For the small bottom drawer I use a scrap of quarter inch plywood I had on hand, just to get rid of some scrap.
I then glue and clamp these up, and when the glue is dry I go back and drive some 1 1/2 inch 18 gauge brads in through the sides to reinforce the rabbetted joints. This is purely precautionary, and I'm not even sure it makes any difference.
Typically, I don't put any glue in the groove for the drawer bottoms, even when I use plywood. But I decide to go ahead and put some glue in them this time, just to help reinforce the drawers since they are so wide.

I cut these grooves using my tablesaw and crosscut sled with my auxiliary fence and stop block assembly. This allows me to copy the cuts from the first piece to the second exactly for good alignment. In hindsight, this degree of accuracy was probably not necessary.


The sled is a Steve Ramsey design (mere mortals table saw sled), and the auxiliary fence is just 3/4 inch plywood made into T-track using the same technique described in that same video. I just clamp the auxiliary fence in place when I need a longer reach on my stop block.
I wanted to make the handles for these drawers match the ones on my top toolbox. Here's a picture of them.

I made these out of pine at the tablesaw using a series of rip cuts. The first cut establishes the back side of the recess.

The second cut rips off a piece to form the bevel on the front of the handle.

The third cut establishes the front side of the recess.

Then I made a few passes to clean ou the waste in between the two cuts. This could also have been done at the router table, but I tend to do everything I can at the table saw.


I make a couple of little blocks to close off the open end of the handles. These are mainly just to get the look I wanted. I doubt if they add much strength

I glue the blocks on.

I glue a false front (1/2 inch plywood) onto the small drawer, and glue the handle on to the false front.

I use the mounted drawers to determine the exact mounting location of the false fronts, and I have to wait on the drawer slides I ordered to come in so I glue the drawer fronts to the handles for the two larger drawers now so I can go ahead and paint them . I finish the drawer bodies in water borne polyurethane now as well, leaving the front unfinished so I can glue on the false fronts later.
Once the drawer slides arrive, I mount the two larger drawers.

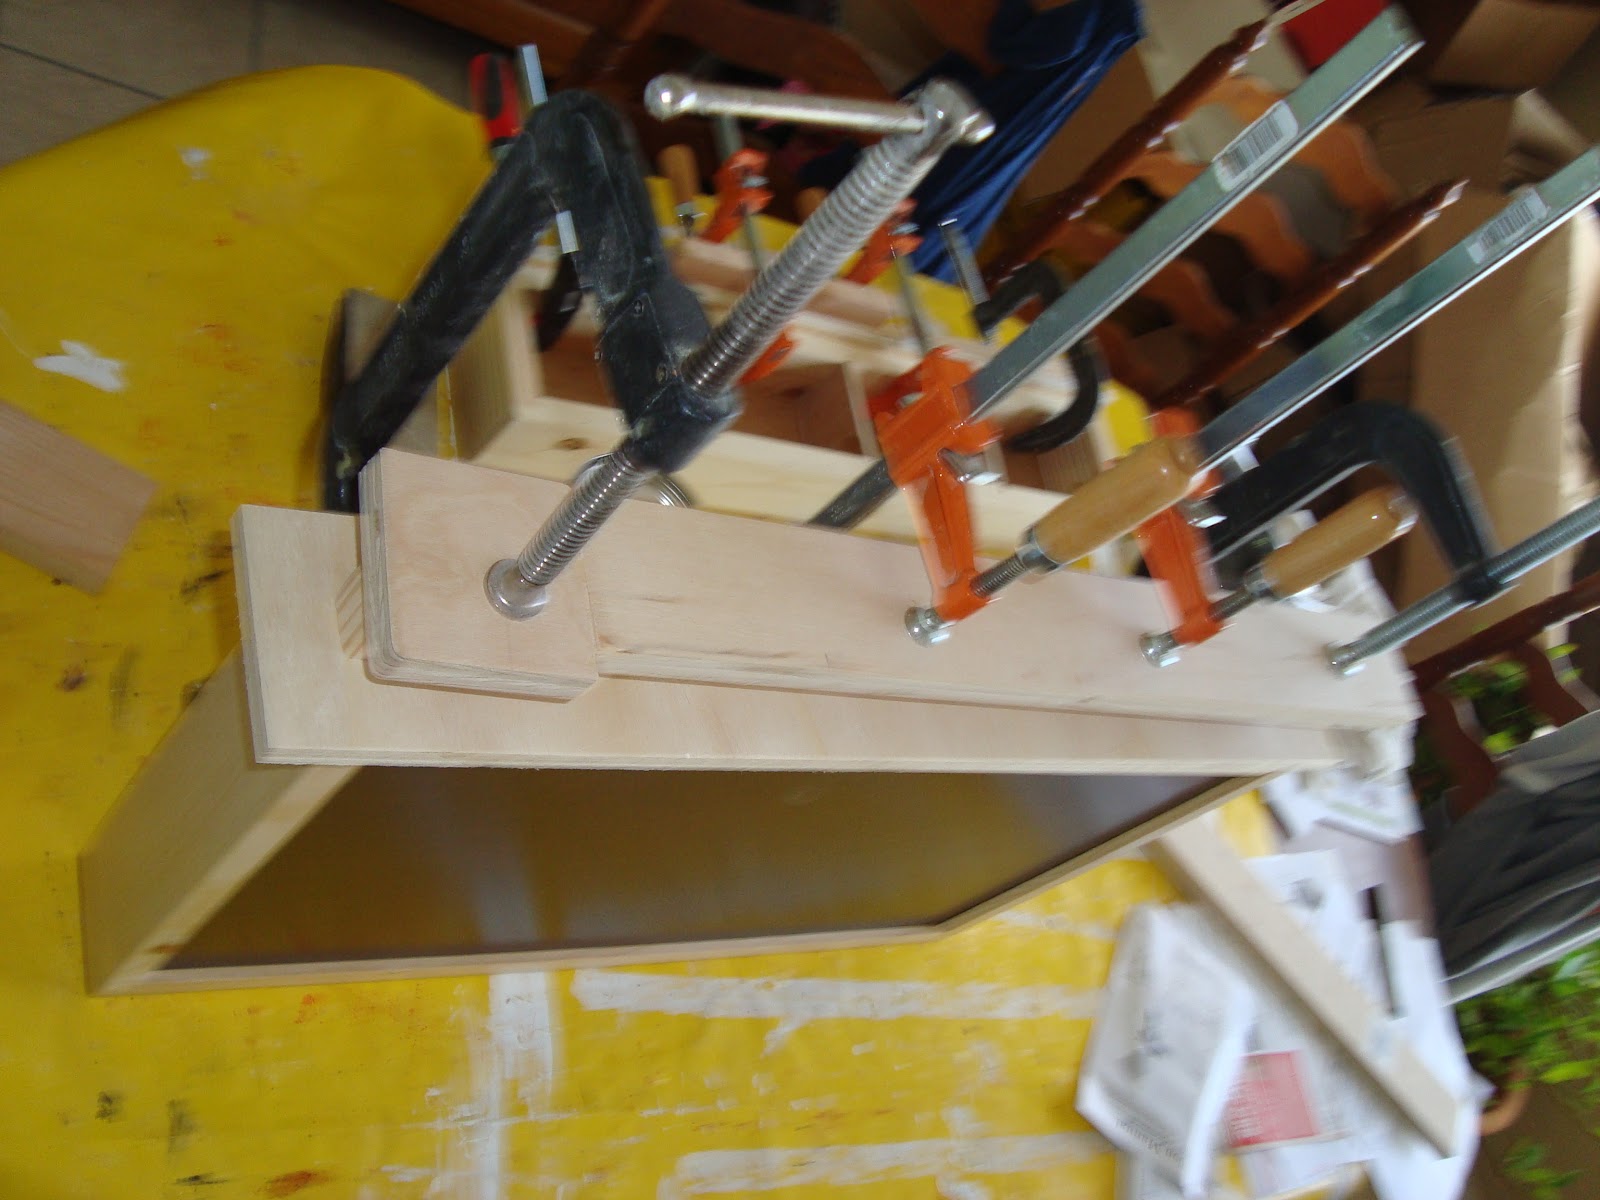
The glue up of the two larger drawer false fronts turned out to be a mad dash, so I didn't get any pictures of the process. This is the process I normally use for attaching drawer false fronts. I attach the bottom drawer front first, making sure it is situated correctly with respect to the case. For this project the small drawer was on the bottom, and I already had the front glued on for it. From there I lay a spacer on top of the bottom drawer front. I like to use a 1/8 inch gap between the drawer fronts, and I have a piece of aluminum yard stick that is that thick. I lay it on top of the bottom drawer front with the drawer installed in the case, and then put glue on the front of the middle drawer carcass. I set the middle drawer front on top of the ruler spacer, and press it against the installed drawer carcass. I shoot a couple of brads through the false front into the carcass somewhere inconspicuous just to keep the drawer front from sliding around and then remove the drawer and clamp the front to the drawer. I do have a picture of that. You can see the drawer front and handle is pre-finished.

I repeat this whole process with the spacer referencing off the middle drawer to install the top drawer front and handle. In hindsight, gluing these drawer fronts on was sort of a pain and installing them with screws instead probably would have been simpler. I often try to avoid using screws because they're expensive, but in this case it probably would have been worth it.
Once the drawer fronts and handles are installed and the exposed pars of the back face of the false fronts has been painted, the project is complete. Here's the finished product. I'm really pleased with the results. More tool storage is always a plus!

We now have email subscription, as well as RSS/Atom subscription options at the top right of our page. Please subscribe to keep up with what we're doing!
No comments:
Post a Comment